Manila folders come in stacks of ten or more, but what to do when you have some old folders that can’t be used any longer? Make an art journal! I had an old folder that had been used many times. I tried to remove the written labels, but the folder had served its purpose by then.
I made a short video on how to turn the folder into an art journal. You can use whatever papers you have. I have a huge stack so it seems I used every conceivable style I could dig up. It turned out very busy but who is judging?
Manila folder art journal
As you can see, I made some mistakes, but what I learned will benefit my next journal! The first one is always trial and error, right?
Seeing as the CV virus still has a hold, I spend a lot of time in my studio. There’s nothing else I’d rather do during this time. Here’s a gallery of items I’ve made in July.
Art I made in July How I feel about 2020, titled The Rollercoaster
I made more items, but these are enough for now. 🙂 I also got back to doing more art journaling. If you missed my last blog post with the tutorial on how to make a manila envelope journal cover, HERE it is.
One of my favorite mixed media artist is Lyn Belisle. She is currently offering a FREE book tutorial, how to make a Lotus book. It is really cool. Check it out HERE. You can’t go wrong with free, and she’s an excellent instructor.
This is it for this blog post. I hope you try the manila folder journal. Send me pictures if you do: [email protected]
Lots of love,
Maria
P.S. Most of my art ends up in my etsy shop, Earth and Faery. Before we know it, Christmas will be here.
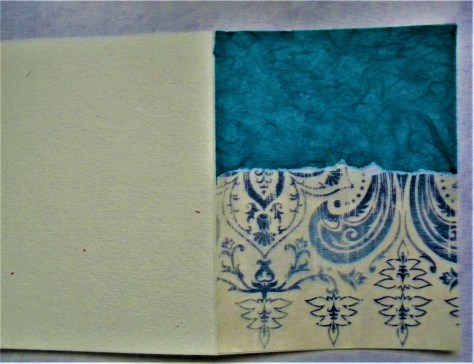
Simple journal cover you ask? Yes, it’s possible. Check out the YouTube video I made creating an easy and fun cover for a new art journal. All you need is a manila envelope, I used a 12×9″ size, but any size is ok. You need some paints, elastic, and stencils or rubber stamps. Use what you have and save yourself a trip to the craft store.
front and back of journal cover
I really like how it turned out, and there are so many variations that you can create. The sky’s the limit. You can also put something in the envelope, use it as a secret pocket.
Simple is great! The more complex the design, the more room for error, though you can’t really go wrong when art journaling.
At a whole other spectrum of creativity, I sewed a cat figure from scrap fabrics.
cat soft sculpture
A friend saw it on Instagram and promptly purchased it. I was happy to part with it. I painted the eyes and appliqued them to the face. A lot of embroidery was involved, and I sewed the body without turning the seams inside. I thought it added a primitive touch to the figure.
Sometimes just winging it makes the best art. 🙂
What are you making today?
If you’re looking for some more inspiration, try this spirit doll assemblage made with an old Altoid tin. HERE
Lots of love,
Maria
P.S. I’m stocking some Christmas items (gifts) in my etsy shop. Check them out HERE.
Christmas is still a few months away, but people seem to enjoy getting a head start on gift shopping, and this year might prove the same–or not. We live in strange times.
I was invited to join the Pfatt Marketplace (Prominent Folk Artist’s Trinkets and Treasures), and I just submitted my Christmas items for the July launch which happens on July 10. New items are for sale every month on the 10th. I enjoy trying out a new venue. I made some angels and a Christmas village. I will use my Etsy name, Earth and Faery there. You can check out the site HERE.
I have been busy this June and it feels good to be productive. I’ve had my eye on a set of metal fondant letter cutters at Michael’s and I finally took the plunge and bought them. I had no idea how they would work out on for my polymer clay, but I wanted to try. They come in a round tin and can be found in the baking department.
letter cutters
In the summer, the polymer clay gets sticky in the heat even though I keep it in the fridge. Once you roll it out it loses its chill. It was hard to get the clay out of the letters. I used the round end of a small brush to poke it through. It dented the clay, and some letters I could turn over, but the others I had to smooth out the best I could. I wasn’t too thrilled about the rounded edges of the letters for some reason.
It’s something you can try with your art.
Christmas in July
They pretty much took over the plaque, but I was pleased in general. I made specialty tiles with red, green, and gold paint, just to make it Christmas-y.
It has been 100 degrees here so it’s hard to get into any kind of Christmas feeling…
The last mixed media village I made sold out, but I have four more houses available now.
Mixed media art houses
Besides making my mosaics, I’ve moved deeper into the rabbit hole of clay figures. I can tell you it’s so much fun! You should try making some. It’s not that hard.
Apoxie Sculpt clay figures
The faces are the hardest part, but the more you practice, the better they get. I also add a little bird to every figure I make. I just like birds a lot. All of my figures are for sale. You can check out my inventory HERE. I add more things every day.
What is holding you back? Fear? Excuses? They are all one and the same, and it sums up to fear. When it comes to creating any kind of art, fear is a constant companion, usually in the shape of resistance.
I wrote a post about resistance and it’s worth a read if you’re not getting anywhere with your art. Lately, I’ve heard a lot of excuses why people don’t create even though they want to at heart.
I suffer from resistance a lot, especially when I’m trying some new art supply or style. Recently, I picked up some tubs of Apoxie Sculpt. (I wrote about it in my last post.) I debated then to put it aside, but I decided to try some more projects with that type of clay. It’s still frustrating to work with, but I have persevered.
Since the clay is pretty expensive, I try to use as many shapes underneath as I can and then cover with a thin layer of clay. It makes it less heavy as well. I bought some styrofoam balls, and to form the body of the birds below, I used one large for the body and one small for the head. I used popsicle sticks, broken in half, to form tails and necks. Here are the end results, a couple of circus birds on “wheels.”
They were fun to make. I used blocks of wood that I covered with papers and wooden wheels. The legs are 19 gauge steel wire. It was a challenge to make these birds, but why not stretch oneself, despite the resistance?
If fear is holding you back…
The only way to overcome it is to do the thing you’re afraid of. Otherwise, it will haunt you. I know this well from previous experiences.
I have found I like making art assemblages. I had to use a drill for simple holes, and it felt awkward and new, but maybe it’s the beginning of new fields of experience.
Don’t let fear hold you back if you want to renew your life, your experiences. It’s not just artistic expression. It’s so easy to stay in the comfort zone, but life gets boring in the long run.
To mix things up, even more, I prepped a bunch of canvases for later use. I love to add mixed media as I go, and I even finished one project when I saw a robust lady emerge from the layers.
Is fear holding you back?
I also made some of my usual objects for sale in my Etsy shop these last few days.
I love the little mosaic Virgin Mary shrines, and now I have used my last Altoids tin!
It’s time to be brave! Make the time to be an explorer, kick the excuses to the curb. Every day is another opportunity for fun creativity.
Magic is in the air in my studio lately. I have been inspired to try new and different things, as in making this type of journal box where you can write down and hide all your secrets. 🙂
I have gone into silicone mold casting adventures and making imprints with my polymer clay or air dry clay. I found small frames and other baroque metal borders and do-dads to use in my mold making. So much fun, and there is never a boring moment as you wait to see how everything turns out.
Anyway, try this journal box
I found a wooden box at Michael’s shaped as a book. It’s pretty big, approx. 7×8″ and it would be too big for polymer clay mosaics. I decided to experiment with mixed media paper, paint, glue, and found objects. I made the tutorial for this box.
Magic mixed media box
I did not take pictures of every single step, but here goes. I painted the entire outside box a dark blue. The inside is painted green, but that does not show in the following picture. I’m giving you an idea of the size.
Inside view of the box
I glued white tissue paper all over the front of the box with Mod Podge, making sure it was good and creased, squeezing it into a ball before I spread it out.
Glued down white tissue paper on the front and spine of the box
On top of the white paper, I glued some yellow tissue paper for contrast and a pale layer of lavender.
I glued down some yellow paper on the frontMagic box with glue
When I was finished with the tissue paper, I made liberal blobs with white craft glue for added texture. I had to let that dry overnight. You can also use blobs made with a hot glue gun and glue the hardened texture down–it’s faster.
Then I rubbed several layers of paint over the dry and creased tissue paper and glue. I began with a dark brown, rubbing it into the deeper texture. I also used dark purple and some turquoise. To tone everything down, I finally spread some white paint over the whole front.
Layers of paintMore layers of paint Magic texture!
When everything was dry, I started digging through my stash of do-dads. Placement can sometimes be tricky. I painted the inside green.
Magic making mixed media
What I used
The metal frame is from a Tim Holtz kit. I stamped the word Journal on a piece of paper, glued it to the back of the frame, and filled in the opening with Judikin’s Diamond Glaze. The flower is a polymer clay imprint from a hair ornament. The key used to be part of an old wind chime, and the hummingbird and the dragonfly are die cut paper, which I sealed carefully front and back and edges with Mod Podge since paper can easily deteriorate. I painted those with Perfect Pearl powder and sealed them again.
Magic box details Words stamped with permanent inkSome felt to make the box softer insideThe back of the box
I cut some green felt that had a sticky side and put that on the bottom of the box for a softer interior. I placed a bought paper border on the outside bottom of the box for more interest. Below is another box I made in the same style. Both of these are available in my Etsy shop Earth and Faery.
If you missed my previous post, Mixed Media Greeting Card Tutorial, you can still find it HERE.
It’s vital to try new creative things, even if it’s a struggle. You master something by doing it. Resistance and self-doubt be gone!
Have a great weekend, and may you always be inspired! 🙂
Mixed media cards are easy to put together. I have so many fabric and paper scraps that I could wallpaper an entire house! I often think about what to do with them as I don’t throw much away, especially the hand-painted fabrics. I have used most of them, so now I have mostly scraps. Why not make some handmade cards and give them along with the gifts to friends?
Two benefits from that: You have fun making the cards, and then passing on the joy (hopefully.) If they don’t like a handmade card, they can “gift it forward.”
The Queen of hearts
I came up with a combo of fabrics and paper to make this Queen of Hearts card. I have many watercolor paper pads, and I don’t paint with watercolors so I’m using the heavy-duty paper in many other ways.
I cut one 9×12″ sheet in half, and then I used a bone folder to press the two pieces of paper into cards. You can also buy blank cards with envelopes at the craft stores.
Mixed media base
I flattened the card and covered it with a paper background on one side. I like to use cool colors to create backgrounds, so I chose blue tones.
mixed media background
I used an old rubber stamp I have of a female face to print onto tan cotton with Stazon deep purple ink. The face looks grayer in the pictures.
mixed media face
To frame the face I needed bolder tones, so I layered some paper outlines. I started with black, and then used some gold wrapping paper as a halo. I added some paper light beams in yellow for more drama.
mixed media detailsmixed media details
I used some hand-painted fabric for the gown and attached it along with the face that I cut from the fabric.
mixed media cardmixed media embellishments
It’s all in the details!
I added small touches, like a red /pink heart, some “wings” and some do-dads at the bottom. I also decided to cut out a small bird from a piece of paper to attach across the top circle.
mixed media embellishments
Added drama
I used black Stazon ink to color the edges to give the card a faint frame. I used a light touch. I also outlined the bird and the heart with a ballpoint pen to make them more pronounced. As you can see, the red bits gave some spark to the card.
There she is, the Queen of Hearts. It’s a good idea to stamp some words inside the card or write a personal message. In my opinion, it makes a great gift to someone you care about, but I might be biased, haha. A suitable caption might be; “Queen for a day, Happy Birthday!”
I used the same watercolor paper to make this simple art journal. Check out the tutorial in this post: Make your Own Art Journals.
If you are in a crafty mode, check out my tutorial on how to make a Spirit Box.
If you feel like making a Spirit Doll, I have faces for sale you can use. They are available in my Etsy shop: Earth and Faery.
To provide the best experiences, we use technologies like cookies to store and/or access device information. Consenting to these technologies will allow us to process data such as browsing behavior or unique IDs on this site. Not consenting or withdrawing consent, may adversely affect certain features and functions.
Functional
Always active
The technical storage or access is strictly necessary for the legitimate purpose of enabling the use of a specific service explicitly requested by the subscriber or user, or for the sole purpose of carrying out the transmission of a communication over an electronic communications network.
Preferences
The technical storage or access is necessary for the legitimate purpose of storing preferences that are not requested by the subscriber or user.
Statistics
The technical storage or access that is used exclusively for statistical purposes.The technical storage or access that is used exclusively for anonymous statistical purposes. Without a subpoena, voluntary compliance on the part of your Internet Service Provider, or additional records from a third party, information stored or retrieved for this purpose alone cannot usually be used to identify you.
Marketing
The technical storage or access is required to create user profiles to send advertising, or to track the user on a website or across several websites for similar marketing purposes.