Tag Archives: diy

Paper clay bowl with painted mandala

Paper clay is so much fun to work with. I don’t know the difference between paper clay and air dry clay, but they are both easy to work with. I like to make little bowls and paint them. It’s actually relaxing and satisfying to paint funky patterns without pre-planning.

I use Plus paper clay:

paper clay bowl

I roll an amount that I think will be enough for a small bowl. I roll it with a baking pin that I usually use for my polymer clay. I try to get the thickness even by eyeing the clay since I don’t have clay “bars” that help to make an even thickness. But handmade doesn’t have to be perfect!

I bend the clay over an object that will make the flat bottom I want. In my case, I used the bottom of an empty Mod Podge bottle. The bowl dries about 24 hours depending on how hot or cold it is.

Above are some examples of recent bowls. I made a YouTube video of my latest bowl, and you can watch it HERE.

I have also been making “heart guardians” from epoxy clay (Apoxie Sculpt) attached to rocks, shells, or geodes. They have been popular in my etsy shop. Here are some I made.

It has been fun to experiment with clay lately. I haven’t painted as much, but everything goes in cycles. I like to go with the flow of the moment. It’s challenging to make something different. I feel a lot of resistance, but when I press through that, I really enjoy the process.

I have some new items in my etsy shop if you’re interested. You can check them out HERE.

Please make your own paper clay bowl. I know you’ll love it! 🙂 You can’t go wrong with the process.

Lots of love,

Maria

Why I love polymer clay

Why I love polymer clay? There are so many reasons, and I will try to mention some here.

Back in the day I read a book by Laurie Mika titled, Mixed Media Mosaics, and I was hooked! I made tray-loads of clay tiles and painted them. I adhered them to any flat surface that would hold them.

That’s how it all started, and then I began making 3D items, and even ventured into some clay jewelry (not many, but fun.)

Now I have branched out from polymer clay to epoxy clay for some items, and I like the challenge of “mastering” a new material.

Polymer clay is such a forgiving and easy-to-work-with material.

All you need is some elbow grease to soften the clay, a few simple tools, and an oven to bake it.

It became a fun challenge to look for things I could imprint on the clay, from vintage buttons to jewelry charms, rubber stamps, and things like bubble wrap and other trash items.

Here are a couple of examples of my recent clay work:

Polymer clay wall art where I used one of my painted faces.
Epoxy clay work, cosplay forest crown
Polymer clay hand sculpted spirit doll faces
Polymer clay faces for sale

I have branched out with my clay faces to include “elementals.” I have a fire elemental at the top of the picture, and also a Frost Queen, which is new to me.

Yesterday I got a wild hair and decided to make a video for my YouTube channel. Octopus eye on a key… hmm, sounds weird right? You can view it here:

Polymer clay octopus with eye on an old key

So I’ve moved from flat surfaces to explore more 3D styles, but mosaics will never get boring to make. Right now, people are into clay faces and making spirit dolls. Everything seems to go in cycles.

If you’re interested in spirit dolls, you can watch my video on how to make one. The link is in my PREVIOUS blog post.

I wish you lots of happy creativity, and if you’re in the market for a quirky gift, please check out my etsy shop, Earth and Faery.

Love, Maria

Mixed media greeting card tutorial

Mixed media cards are easy to put together. I have so many fabric and paper scraps that I could wallpaper an entire house! I often think about what to do with them as I don’t throw much away, especially the hand-painted fabrics. I have used most of them, so now I have mostly scraps. Why not make some handmade cards and give them along with the gifts to friends?

Two benefits from that: You have fun making the cards, and then passing on the joy (hopefully.) If they don’t like a handmade card, they can “gift it forward.”

The Queen of hearts

I came up with a combo of fabrics and paper to make this Queen of Hearts card. I have many watercolor paper pads, and I don’t paint with watercolors so I’m using the heavy-duty paper in many other ways.

I cut one 9×12″ sheet in half, and then I used a bone folder to press the two pieces of paper into cards. You can also buy blank cards with envelopes at the craft stores.

mixed media base: watercolor paper
Mixed media base

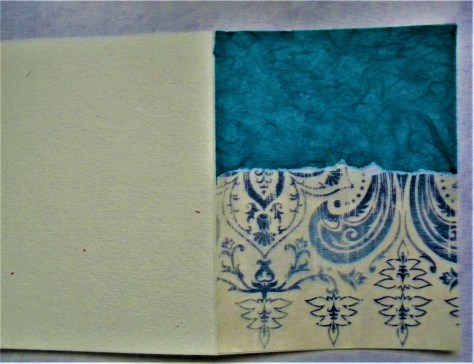
I flattened the card and covered it with a paper background on one side. I like to use cool colors to create backgrounds, so I chose blue tones.

mixed media background

I used an old rubber stamp I have of a female face to print onto tan cotton with Stazon deep purple ink. The face looks grayer in the pictures.

mixed media face
mixed media face

To frame the face I needed bolder tones, so I layered some paper outlines. I started with black, and then used some gold wrapping paper as a halo. I added some paper light beams in yellow for more drama.

Mixed media background
mixed media details
mixed media details
mixed media details

I used some hand-painted fabric for the gown and attached it along with the face that I cut from the fabric.

mixed media card
mixed media card
mixed media embelliishments
mixed media embellishments

It’s all in the details!

I added small touches, like a red /pink heart, some “wings” and some do-dads at the bottom. I also decided to cut out a small bird from a piece of paper to attach across the top circle.

mixed media embellishments

Added drama

I used black Stazon ink to color the edges to give the card a faint frame. I used a light touch. I also outlined the bird and the heart with a ballpoint pen to make them more pronounced. As you can see, the red bits gave some spark to the card.

There she is, the Queen of Hearts. It’s a good idea to stamp some words inside the card or write a personal message. In my opinion, it makes a great gift to someone you care about, but I might be biased, haha. A suitable caption might be; “Queen for a day, Happy Birthday!”

I used the same watercolor paper to make this simple art journal. Check out the tutorial in this post: Make your Own Art Journals.

If you are in a crafty mode, check out my tutorial on how to make a Spirit Box.

If you feel like making a Spirit Doll, I have faces for sale you can use. They are available in my Etsy shop: Earth and Faery.

Have a great creative weekend!!

Lots of love,

Maria