Category Archives: craft

Magic Journal Box tutorial

Magic is in the air in my studio lately. I have been inspired to try new and different things, as in making this type of journal box where you can write down and hide all your secrets. 🙂

I have gone into silicone mold casting adventures and making imprints with my polymer clay or air dry clay. I found small frames and other baroque metal borders and do-dads to use in my mold making. So much fun, and there is never a boring moment as you wait to see how everything turns out.

Anyway, try this journal box

I found a wooden box at Michael’s shaped as a book. It’s pretty big, approx. 7×8″ and it would be too big for polymer clay mosaics. I decided to experiment with mixed media paper, paint, glue, and found objects. I made the tutorial for this box.

Magic mixed media journal box tutorial
Magic mixed media box

I did not take pictures of every single step, but here goes. I painted the entire outside box a dark blue. The inside is painted green, but that does not show in the following picture. I’m giving you an idea of the size.

Magic box mixed media tutorial
Inside view of the box

I glued white tissue paper all over the front of the box with Mod Podge, making sure it was good and creased, squeezing it into a ball before I spread it out.

Magic box tutorial
Glued down white tissue paper on the front and spine of the box

On top of the white paper, I glued some yellow tissue paper for contrast and a pale layer of lavender.

Magic box with tissue paper
I glued down some yellow paper on the front
Magic box with glue
Magic box with glue

When I was finished with the tissue paper, I made liberal blobs with white craft glue for added texture. I had to let that dry overnight. You can also use blobs made with a hot glue gun and glue the hardened texture down–it’s faster.

Then I rubbed several layers of paint over the dry and creased tissue paper and glue. I began with a dark brown, rubbing it into the deeper texture. I also used dark purple and some turquoise. To tone everything down, I finally spread some white paint over the whole front.

Magic box with layers of paint
Layers of paint
Magic box tutorial
More layers of paint
Magic texture!

When everything was dry, I started digging through my stash of do-dads. Placement can sometimes be tricky. I painted the inside green.

Magic box tutorial
Magic making mixed media

What I used

The metal frame is from a Tim Holtz kit. I stamped the word Journal on a piece of paper, glued it to the back of the frame, and filled in the opening with Judikin’s Diamond Glaze. The flower is a polymer clay imprint from a hair ornament. The key used to be part of an old wind chime, and the hummingbird and the dragonfly are die cut paper, which I sealed carefully front and back and edges with Mod Podge since paper can easily deteriorate. I painted those with Perfect Pearl powder and sealed them again.

Magic box tutorial
Magic box details
Magic box tutorial
Words stamped with permanent ink
Magic felt on the bottom of the box
Some felt to make the box softer inside
Magic box tutorial
The back of the box

I cut some green felt that had a sticky side and put that on the bottom of the box for a softer interior. I placed a bought paper border on the outside bottom of the box for more interest. Below is another box I made in the same style. Both of these are available in my Etsy shop Earth and Faery.

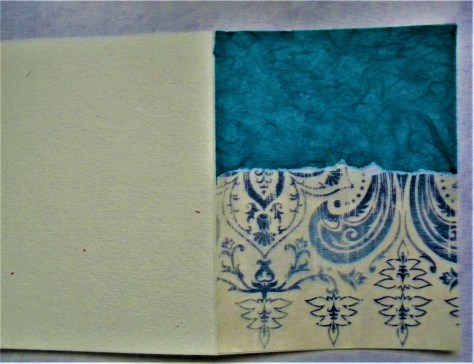
If you missed my previous post, Mixed Media Greeting Card Tutorial, you can still find it HERE.

It’s vital to try new creative things, even if it’s a struggle. You master something by doing it. Resistance and self-doubt be gone!

Have a great weekend, and may you always be inspired! 🙂

Lots of love,

Maria

Mixed media greeting card tutorial

Mixed media cards are easy to put together. I have so many fabric and paper scraps that I could wallpaper an entire house! I often think about what to do with them as I don’t throw much away, especially the hand-painted fabrics. I have used most of them, so now I have mostly scraps. Why not make some handmade cards and give them along with the gifts to friends?

Two benefits from that: You have fun making the cards, and then passing on the joy (hopefully.) If they don’t like a handmade card, they can “gift it forward.”

The Queen of hearts

I came up with a combo of fabrics and paper to make this Queen of Hearts card. I have many watercolor paper pads, and I don’t paint with watercolors so I’m using the heavy-duty paper in many other ways.

I cut one 9×12″ sheet in half, and then I used a bone folder to press the two pieces of paper into cards. You can also buy blank cards with envelopes at the craft stores.

mixed media base: watercolor paper
Mixed media base

I flattened the card and covered it with a paper background on one side. I like to use cool colors to create backgrounds, so I chose blue tones.

mixed media background

I used an old rubber stamp I have of a female face to print onto tan cotton with Stazon deep purple ink. The face looks grayer in the pictures.

mixed media face
mixed media face

To frame the face I needed bolder tones, so I layered some paper outlines. I started with black, and then used some gold wrapping paper as a halo. I added some paper light beams in yellow for more drama.

Mixed media background
mixed media details
mixed media details
mixed media details

I used some hand-painted fabric for the gown and attached it along with the face that I cut from the fabric.

mixed media card
mixed media card
mixed media embelliishments
mixed media embellishments

It’s all in the details!

I added small touches, like a red /pink heart, some “wings” and some do-dads at the bottom. I also decided to cut out a small bird from a piece of paper to attach across the top circle.

mixed media embellishments

Added drama

I used black Stazon ink to color the edges to give the card a faint frame. I used a light touch. I also outlined the bird and the heart with a ballpoint pen to make them more pronounced. As you can see, the red bits gave some spark to the card.

There she is, the Queen of Hearts. It’s a good idea to stamp some words inside the card or write a personal message. In my opinion, it makes a great gift to someone you care about, but I might be biased, haha. A suitable caption might be; “Queen for a day, Happy Birthday!”

I used the same watercolor paper to make this simple art journal. Check out the tutorial in this post: Make your Own Art Journals.

If you are in a crafty mode, check out my tutorial on how to make a Spirit Box.

If you feel like making a Spirit Doll, I have faces for sale you can use. They are available in my Etsy shop: Earth and Faery.

Have a great creative weekend!!

Lots of love,

Maria

Fabric collage on boho bag

Fabric collage is one of my “things.” I have painted and dyed fabric over time and now have a nice stash of unique colors and styles to use for my fabric collages. These collages are usually attached to everyday usable items, which is a bonus.

Fabric collage makes a unique product that gets many ohhs and ahhs from (mostly) my fellow artists. No everyone likes a whimsical bag on their arm.

I got inspired with the last canvas mini bag and made a video of the process. To see how the other bags turned out, please check my two previous posts.

Exploring art on fabric.

Slow stitching and painting on a pouch.

For this last bag check out my YouTube video HERE.

fabric collage

I filmed and filmed and just as I was done, the camera batteries died. What perfect timing, huh?

You might ask how I dye fabric. There is always the conventional fabric dyes in the stores, but I like to make patterns and mix the colors.

I use mostly alcohol inks and diluted acrylic paints in spray bottles. I rinse out as much as I can, but the alcohol inks leave a pretty mighty color infusion. I use mostly cotton fabric because it absorbs the paints the best.

The acrylic paints usually embed themselves in the fabric, and when they dry, they are pretty stiff, but still flexible enough to use. I usually just spread the fabric on a drop cloth to dry.  Try different paints, and make sure they are color fast after drying, otherwise they will wash out.

I have added the four fabric collage bags / pouches to my etsy shop, Earth and Faery. 

There are many items in my shop at the moment since the holidays are coming.  I have felt a creative high for some weeks and I’m grateful for the flow. Sometimes I have long periods of no great inspiration, but I keep showing up in my studio. That’s what you do!

If you want some art journaling inspiration, I have a bunch of easy videos on YouTube under my name.  Keep creating. The process will  make you grow.

I wish you a creative and fun weekend!

Love,

Maria

Handmade gifts are awesome

Handmade gifts are awesome because they contain a bit of YOU. It could be as simple as a batch of cookies, or as complicated as a large bronze statue (though I don’t see anyone giving me a metal statue for my birthday…)

Gifts can be a quagmire though. Take the example of cookies: there are vegan cookies, sugar-free cookies, and cookies the person is allergic to, and regular sugar-laden cookies.

So, the safe thing is to make something pretty. I love hand-knitted and hand-painted things, like boxes and usable items like cardholders and coin purses.

The sky is the limit! Since my etsy shop is called Earth and Faery I like to make things that are magical but also down to earth.

Since school just started here, I thought of a gift a child might like and came up with a pencil box that I painted and embellished.

pencil box

This is the end result, a mystical night view with a fairy and a dragonfly.

I bought a box of raw wood, which I sanded within an inch of its life. Then I painted some primer, using craft paints. The last layers of paint are done with artist acrylics for better results. Pictures are in the sequence of production.

pencil box
primer

pencil box
primer

pencil box
lid artist paints

In the above picture I used three shades of purple to get the night sky, using artist acrylics.

pencil box
inside finished

pencil box
lid embellished with gold paint

pencil box
fairy and dragonfly

There you can see the details of the lid embellishment. Simple but fun and I think some child would treasure it, don’t you?  As a child I would have been enchanted to receive this gift.

We don’t receive enough homemade gifts in my opinion. All the cold store-bought things just inspire you to buy more (in search of that thing that gives a sense of satisfaction within.)

I prefer to give gifts people can use, like candles, edibles, boxes for keepsakes, knitted wash cloths or hot pads, a painting (IF the person professed a liking prior (unless they were lying…)) That’s their problem then. 🙂

Etsy is full of cool handmade gifts. Maybe this Christmas is a good time for a shift in gift giving, what do you think?

If you liked this simple tutorial on how to paint a wooden box, you can check out this blog post about making a handmade art journal. GREAT gift!!

Crafty girl’s guide to art journal making.

An art journal for an artsy friend is surely the best gift.

I also have a short e-course on how to make a polymer clay mosaic embellished box. Check it out.

Polymer Clay Mosaic Box from start to finish.

I know we’re a long way from Christmas still, but now is the time to look into making handmade gifts. What calls to you? Yarn? Check out some local sales. It’s a good start.

Have a creative week, lovelies!

xo

Maria

P.S. I have lots of goodies in my etsy shop right now just in case people don’t want to make their own…Earth and Faery.


Crafty girl’s guide to art journal making

Crafty girl’s guide is a way to save on your art journals. Most of us mixed media artists drool over Moleskine and Strathmore brands, and many more, but they make a big dent in our wallets too.

Not that it’s bad to spend on good art materials. I do spend, but sometimes I like to make my own journal because it has “me” branded on it, not spiral binding or ugly covers.

I like to embellish the store-bought covers, but it’s something special about making your own.

I have even made some to sell in my etsy shop because beginning art journalers sometimes have a hard time with the blank page, so I make some simple backgrounds on the pages.

I buy watercolor paper on sale and take the pads apart for easy art making.

Then I fold the painted pages and use a bone folder to flatten the crease as much as possible. I sew the pages together with embroidery thread or hemp string.

The reason I like embroidery thread is that it’s colorful and strong, and flexible.

Crafty girls know how to be creative with the backgrounds in the journal. The more you create, the more your creativity blossoms.

Make your own!

crafty girl's art journal making
crafty girl’s journal

This is the latest journal I made. I covered the front and back with some vintage paper. The cover can be painted or more ephemera added on top. The label can be affixed anywhere or left out.

So much fun!

crafty girl's guide to art journal making

Above is a sample page of a background, and below are a few more. As you can see, crafty girl’s can make this EASILY!

crafty girl's guide to art journaling

crafty girl's guide to art journaling

So easy… A while back I made a video on how to put the pages together into a journal.  HOW TO VIDEO.

I have written some posts about art journaling basics for you. CLICK HERE TO READ.

ART JOURNALING STUFF (mostly cool backgrounds.)

If you need a push, here’s another post about the importance of allowing yourself to make art. BEGIN NOW! 

Now you can make your own journal and get started with art. There are no excuses and there is no time to lose. If you love art, make some today!

xo

Maria

P.S. I made a simple e-course on how to make a variety of art journals. It’s for the crafty girl in you! 🙂 CLICK HERE. 

You can also visit my etsy shop for more journals if you don’t want to make your own. EARTH AND FAERY


You want to sell art?

You want to sell art? Well, why not. We need more art in the world and yours makes a difference. Everyone’s art perspective counts.

People usually advise against becoming an artist since they always equate such a creature with a “starving artist.” Side note: I feed a feral cat and many people do, so why would we not feed starving artists??

There are many ways around the starvation syndrome, one is to become a creative thinker and produce many streams of income. (You can always get a sugar daddy or mama… joking.)

rainbow rose
rainbow rose

I painted the rose above in ’06 and I sold 7 versions of the same painting. I still own this one but I might put it in my etsy shop.

I paint, make mixed media art, art journaling, and several crafts. I enjoy them all. I started selling paintings on eBay back in 2003 (how time flies!) What did I learn from that?

  • Always add hanging mechanisms on the back of the art. All I did was varnish the paintings and send them off. 🙂 Small paintings work well with sawtooth hangers. Large paintings require picture wire and eye hooks. Apply the eye hook to the INSIDE edge of the stretcher bars so that the picture will hang flat against the walls once you attach the wire.
  • Paint on gallery wrapped canvas or some other professional surface. If you paint on cheap stretched canvas and the staples show on the sides, you give the impression of “starving artist.” (Gallery wrapped canvas is the kind that is stapled to the back of the stretcher frame.)
  • If you can afford it, always buy stretched canvases with the deep 1″ edge.  They look so much better, and definitely don’t need a frame, which is a selling point. If you’re handy, stretch your own canvas. You can get rolled canvas for great deals on eBay. Other surfaces that are usable are Masonite and luon-covered plywood. Places like the Home Depot can cut them to size right there. You need to gesso the surfaces and they need to be framed (by the buyer.)
  • Write eye-catching descriptions if you sell online. That is a make or break point besides awesome art.  Use TAGS, as many as you can think of, so that peeps can find your art during a search.

sisterhood painting
Sisterhood

Sisterhood was a painting I ended up making eight versions of and they all sold. This was back in 2008. People have wanted to use the art for their business cards. I think women loved these paintings because of the sisterhood idea.

  • When something works, make several versions that show the same theme, different shapes and colors. I get tired of repeating myself, but I make as many as I can stand.
  • If you use mixed media, make sure the papers and ephemera are glued down securely. Nothing is more annoying than flimsy edges and corners that stick up.
  • Use a quality acrylic varnish to finish off the artwork.
  • Try lots of different styles until something clicks and you come home to yourself.
  • Master some kind of fun craft and sell the things you make.

polymer clay mosaic art
polymer clay mosaic

Crafts are like a meditation for me.

If you can only focus on one kind of artistic expression, do what you love the most and hold a part time job to pay the bills until your art takes off.

In this day and age, you can find our art spread all over the internet. I sell art and crafts all over the world through my two etsy shops. I find that my crafts sell better, but painting is my first love.

Arts and crafts shows were never something I wanted to do, but I know artists who do well with those. Whatever floats your boat.

Today I focus online and I have been creating art e-courses for the last couple years. Talk about a giant learning curve… lots of fun!

The bottom line: MAKE ART EVERY DAY, and you will sell some, guaranteed!

xo

Maria

P.S. I have lots of lovely and affordable gifts in my etsy shop EARTH AND FAERY. Support a successful living artist today! 🙂