Category Archives: mixed media

Polymer clay mosaic tutorial.

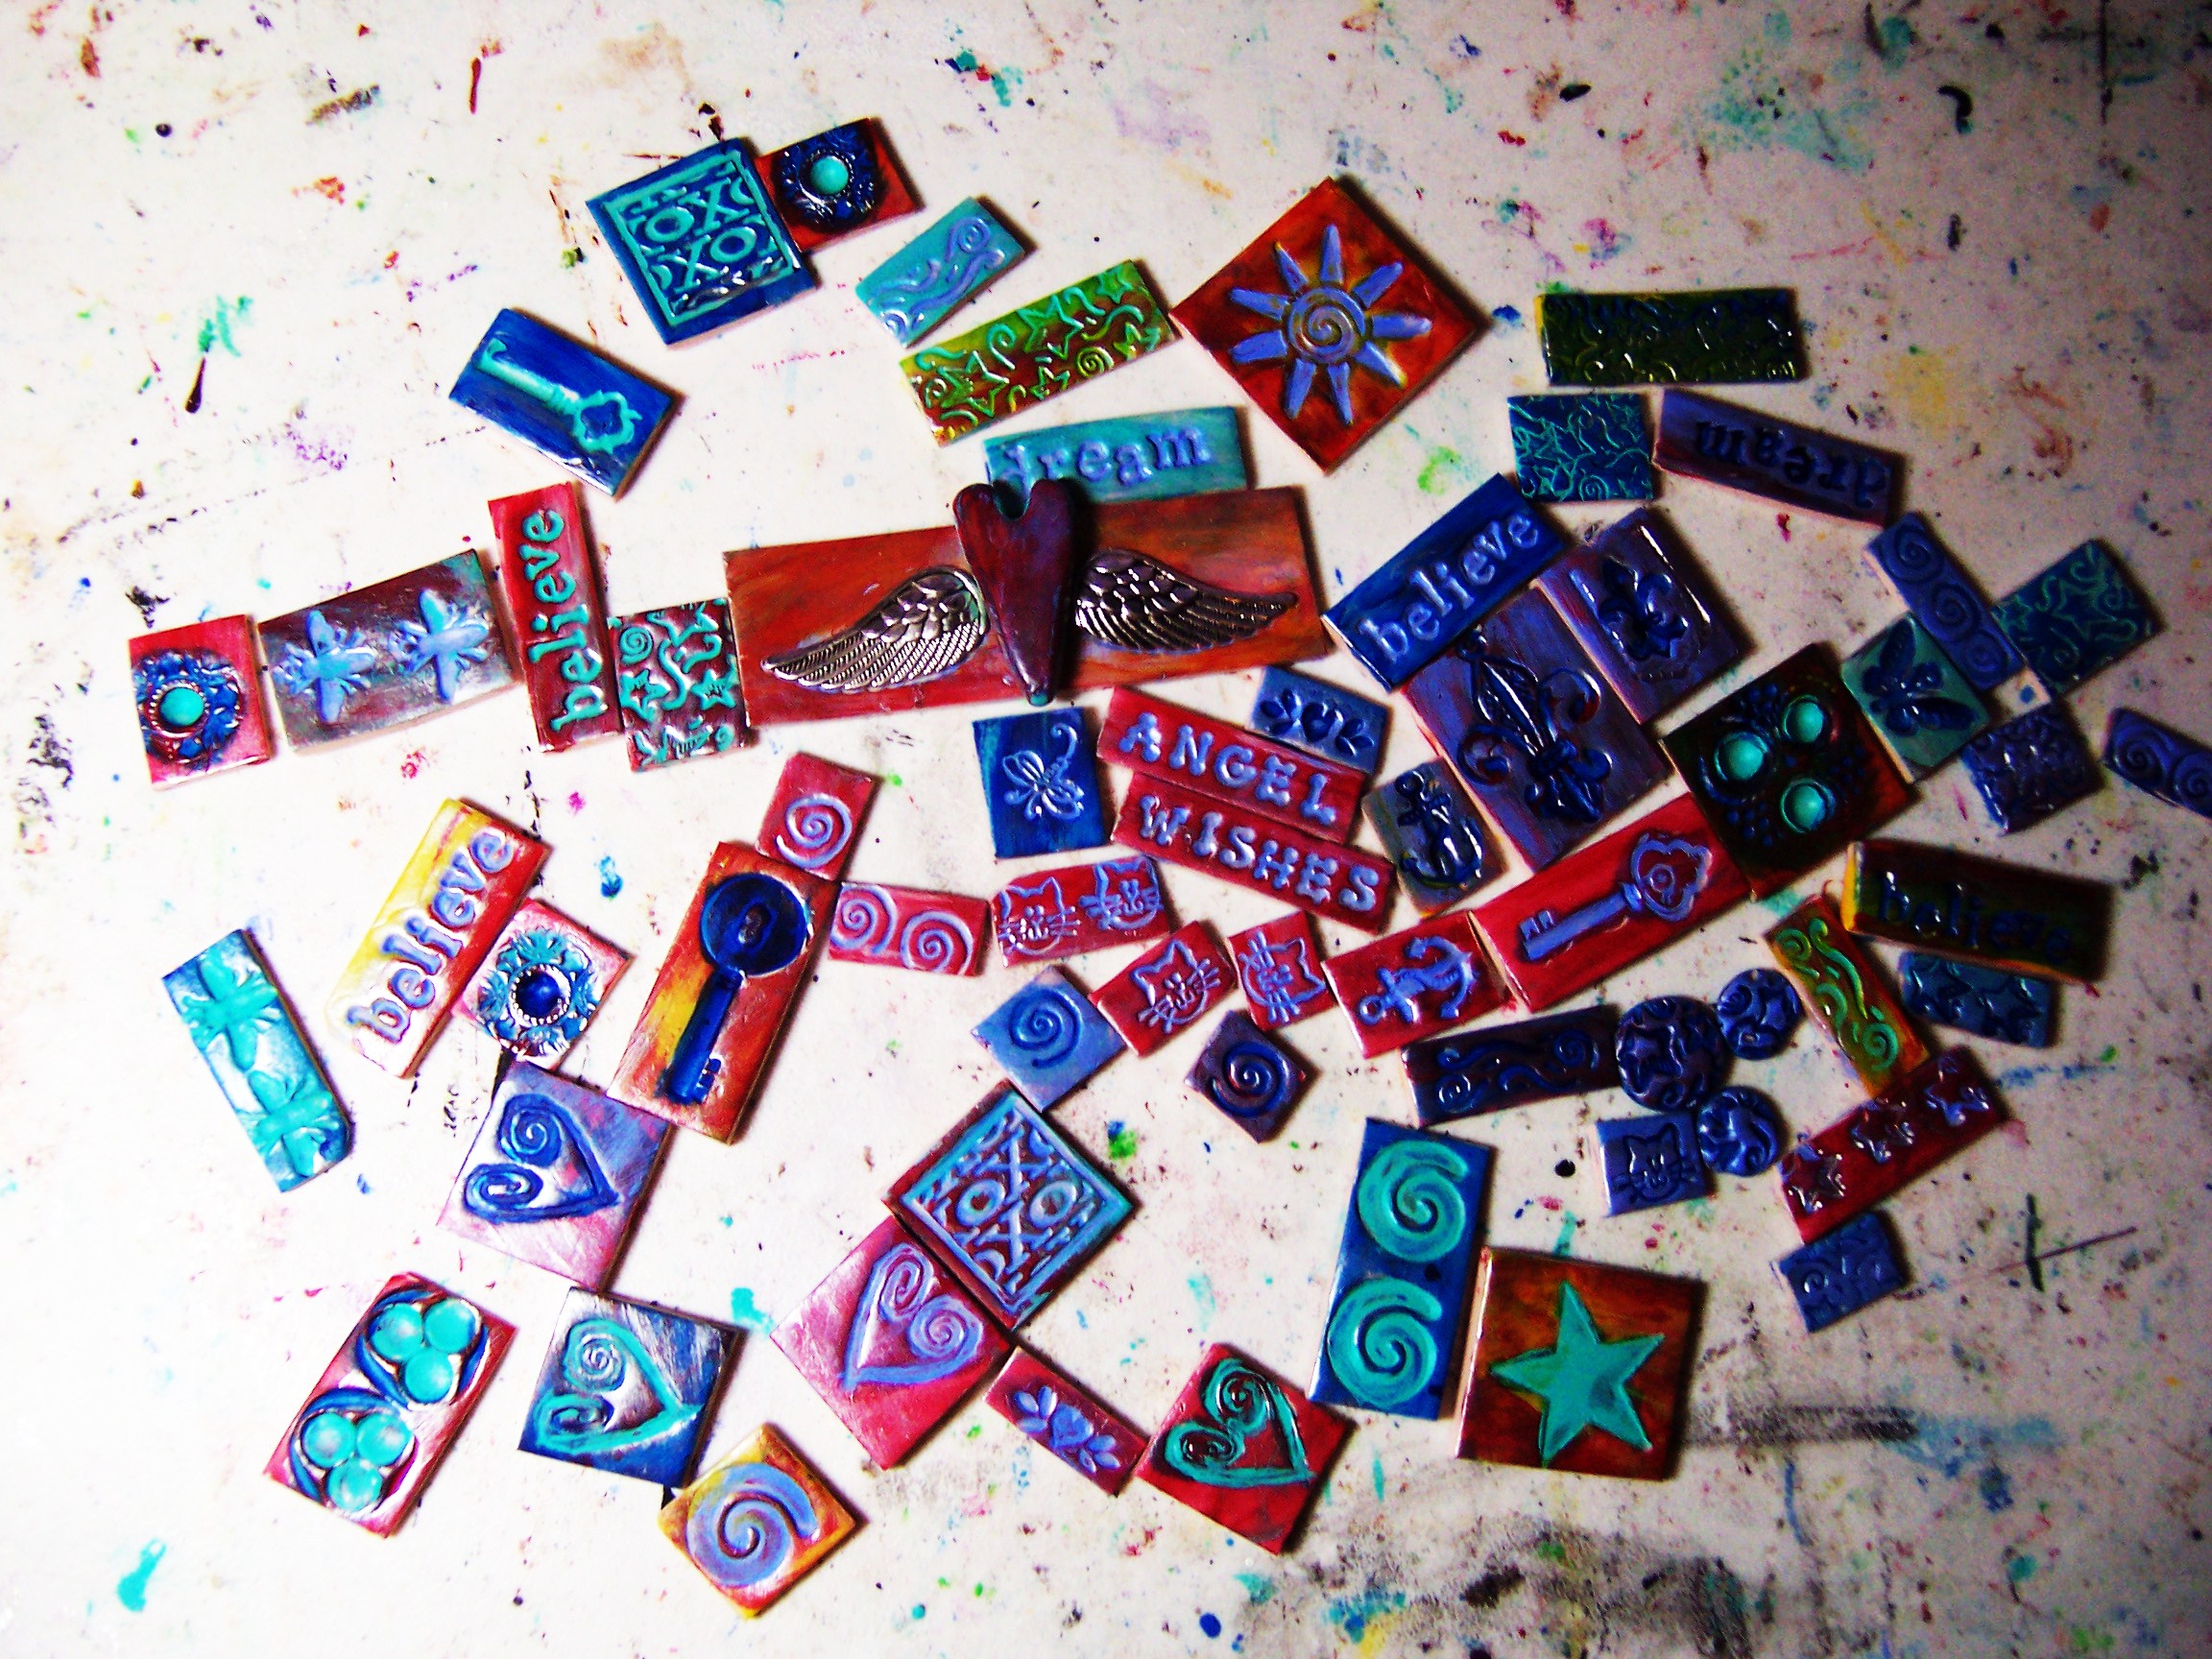
People have been asking me about more polymer clay mosaic tutorials.

I have posted before on how to paint the baked tiles, and there is a YouTube video on how to paint them as well.  CLICK HERE.

Here are some pictures on how to put the mosaic together with the finished tiles. Since this is a star box I had to fiddle with and cut some of the tiles, which is tricky since they break pretty easily.  It’s much easier to make a square or rectangular design.

polymer clay mosaic tiles
painted tiles ready to be assembled
star box lid
Box top painted black

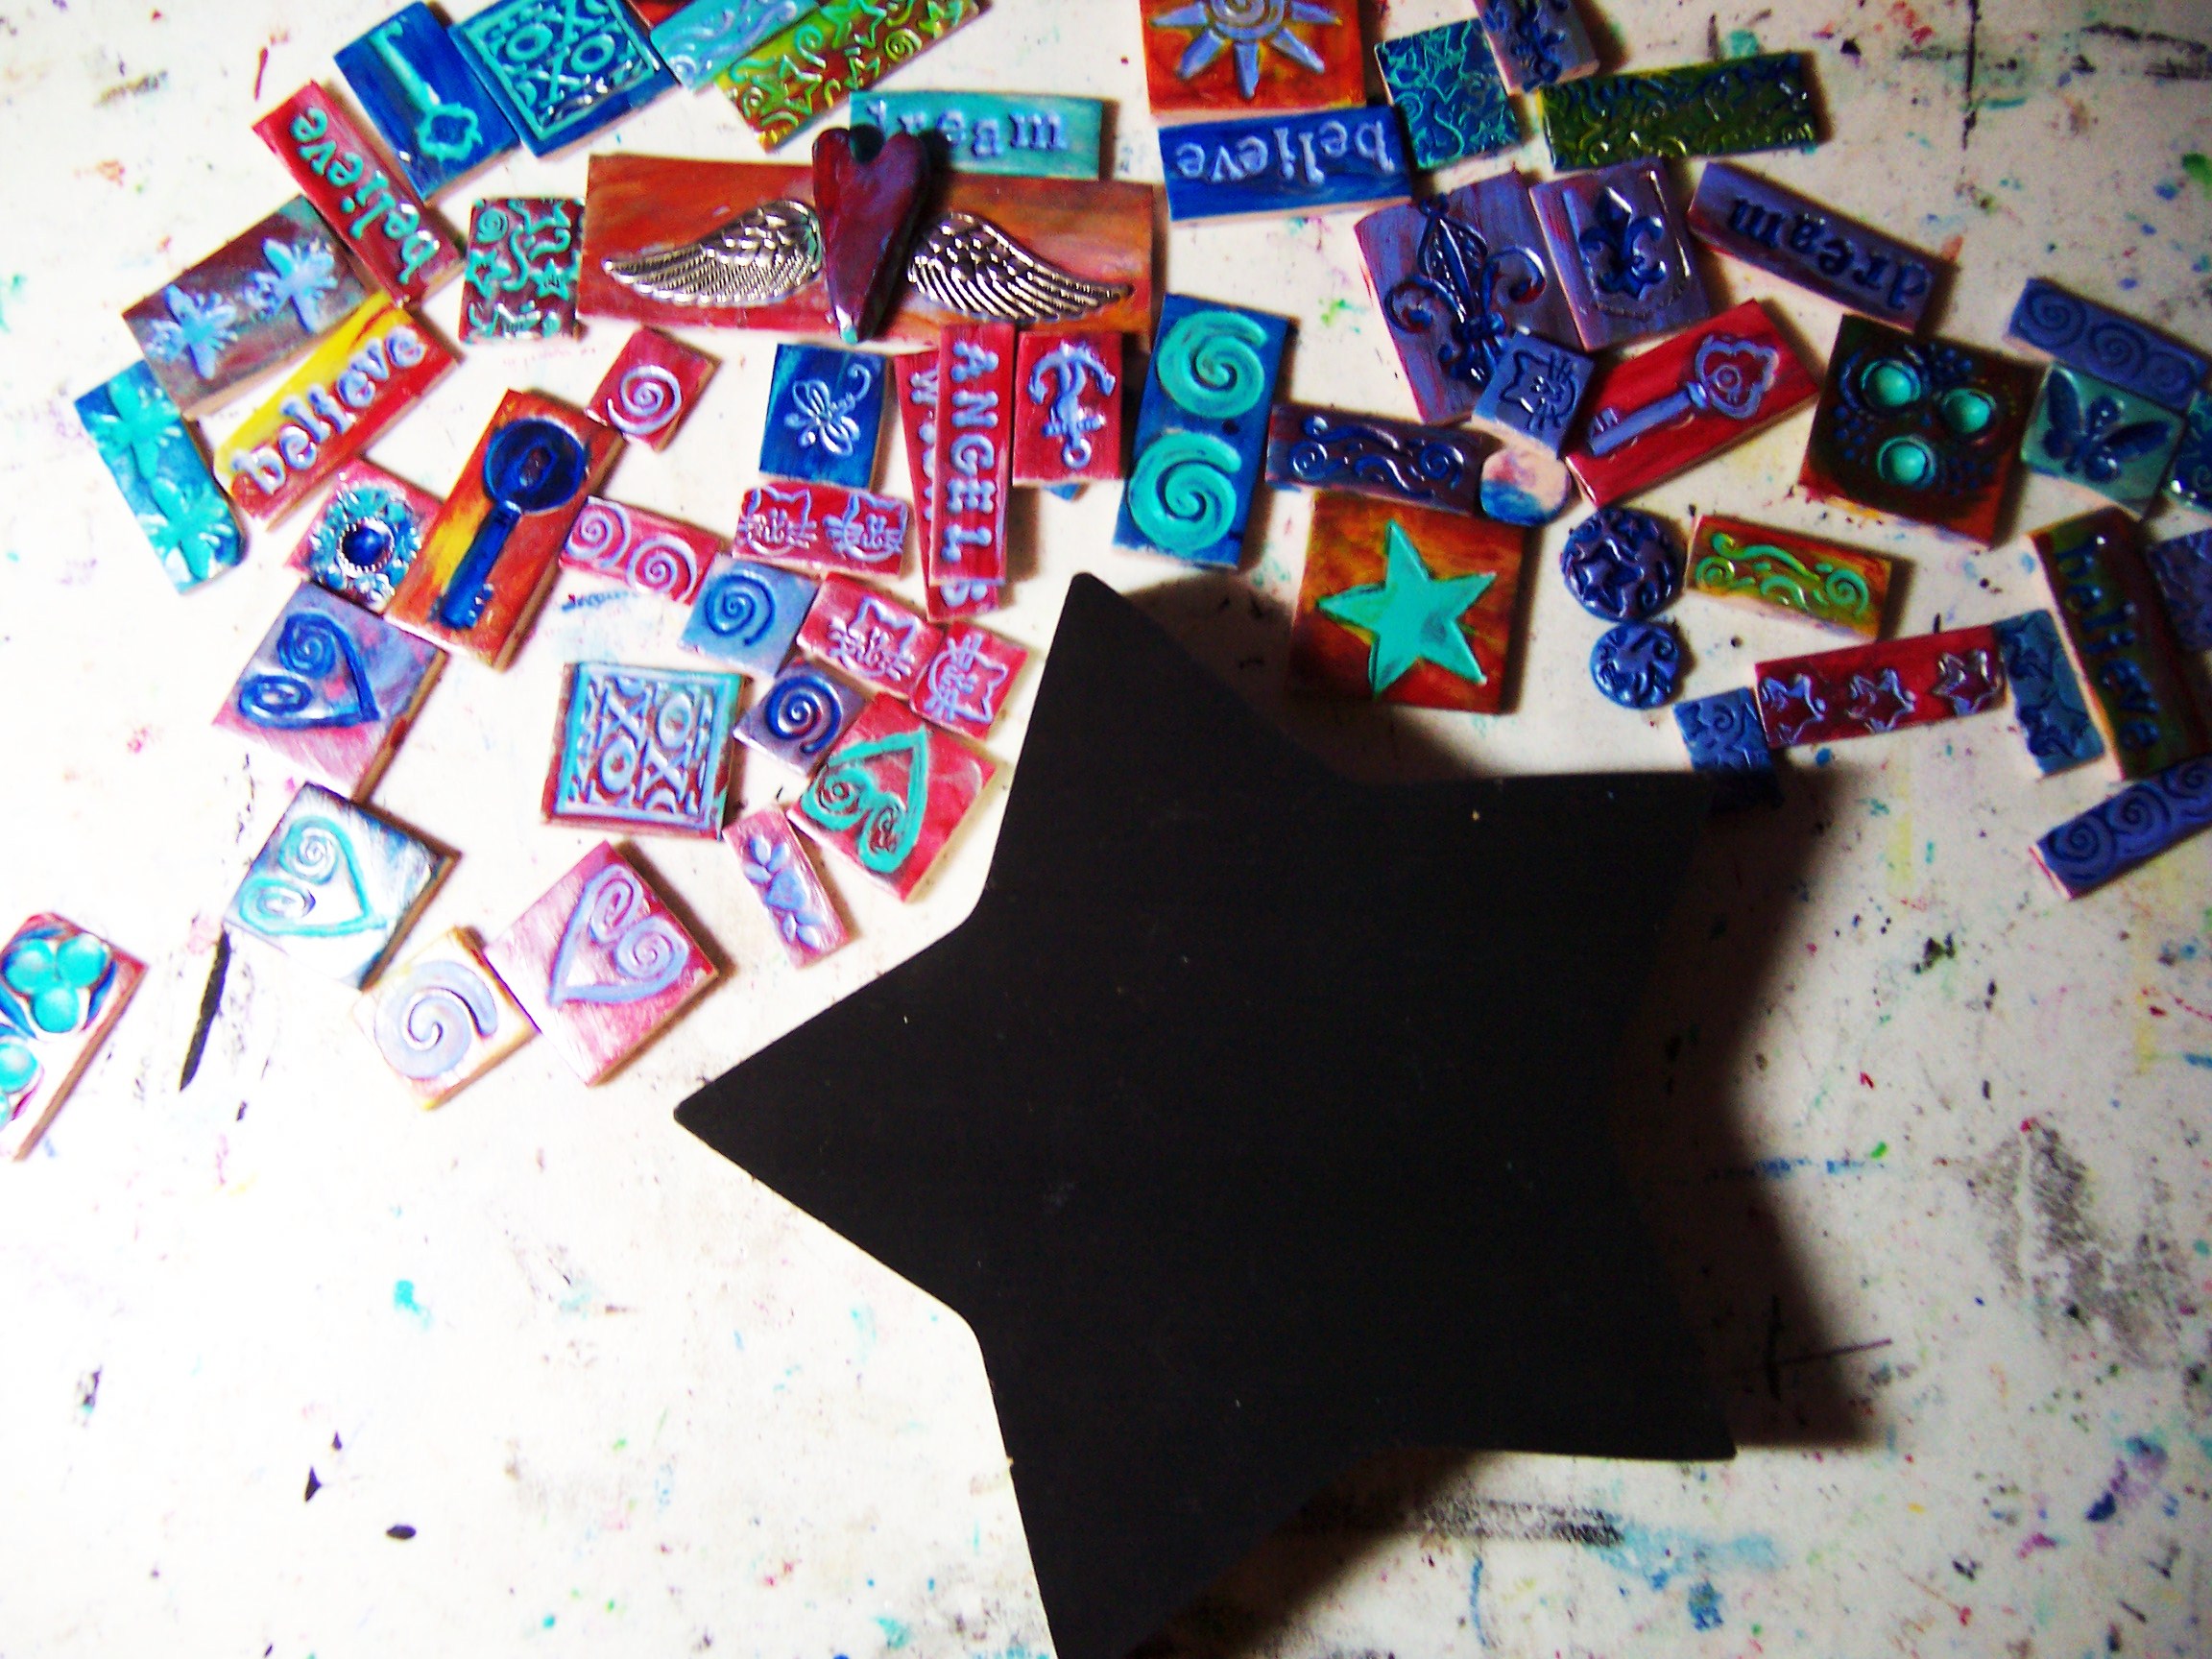
I paint the lids black to hide any gaps between the tiles. If the gap is too big I place some glue and drop some seed beads to fill the gap.

layout
layout, one tile at a time
finished design
Tiles fitted and glued down

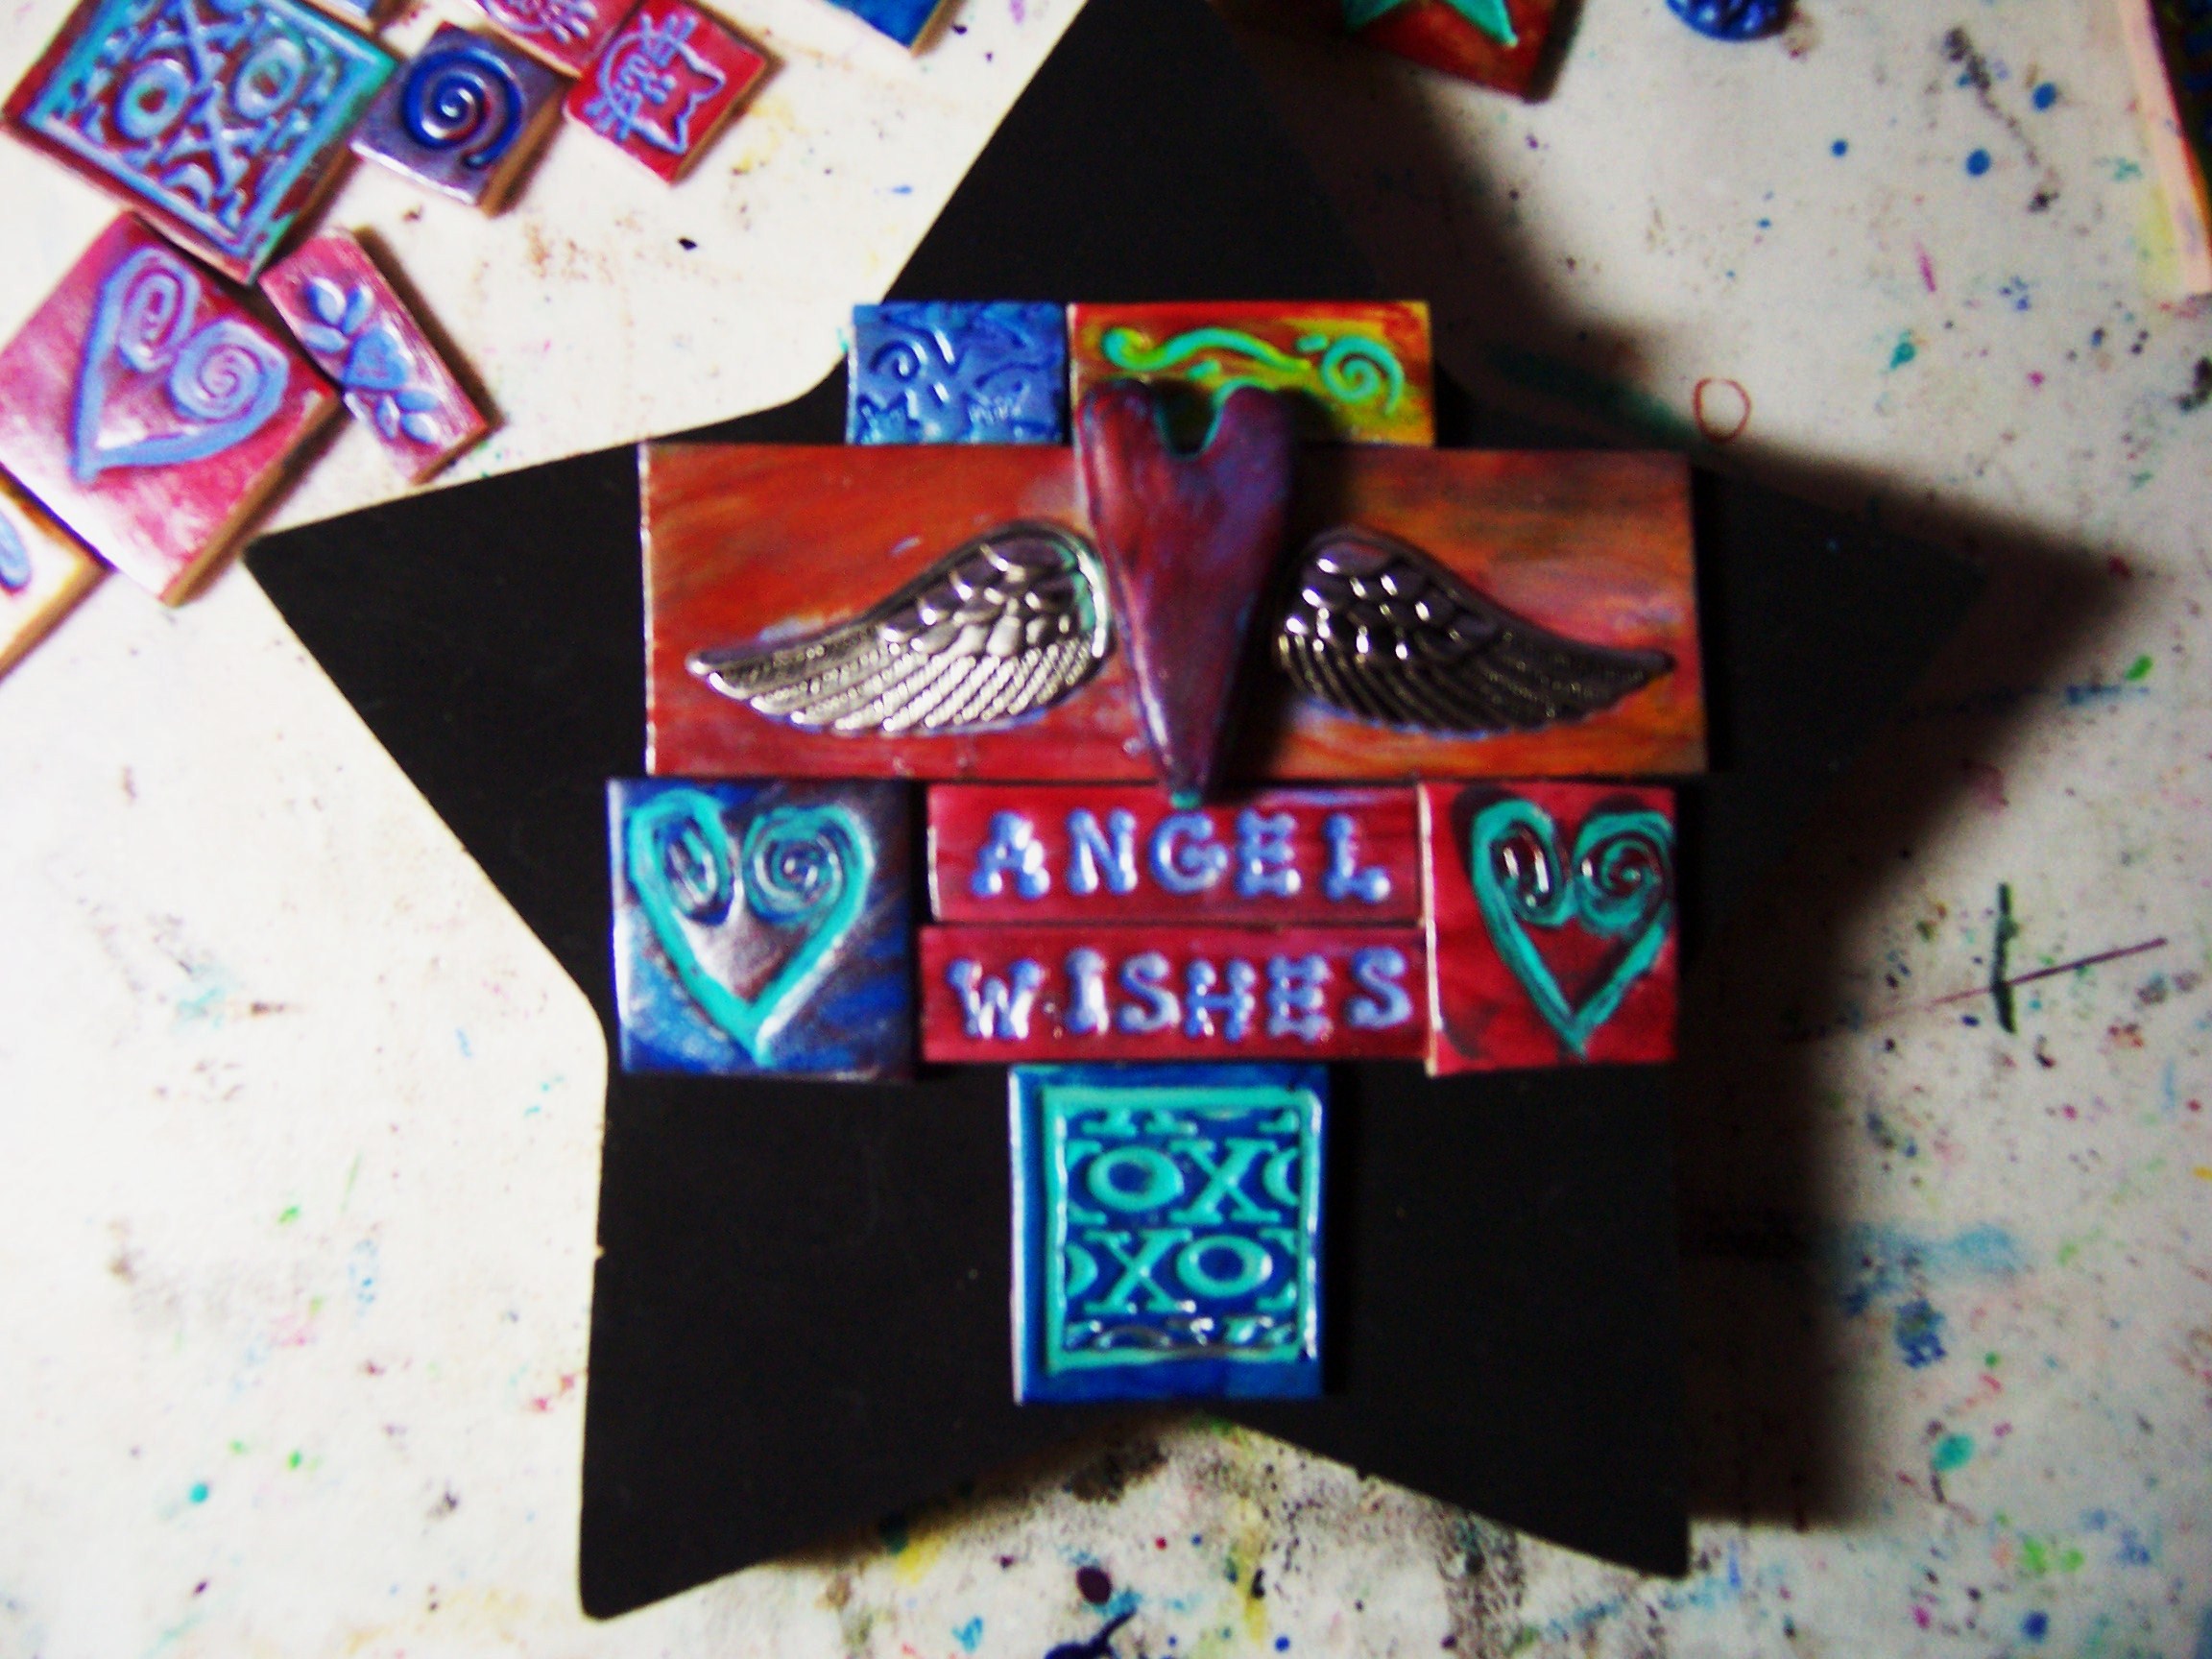
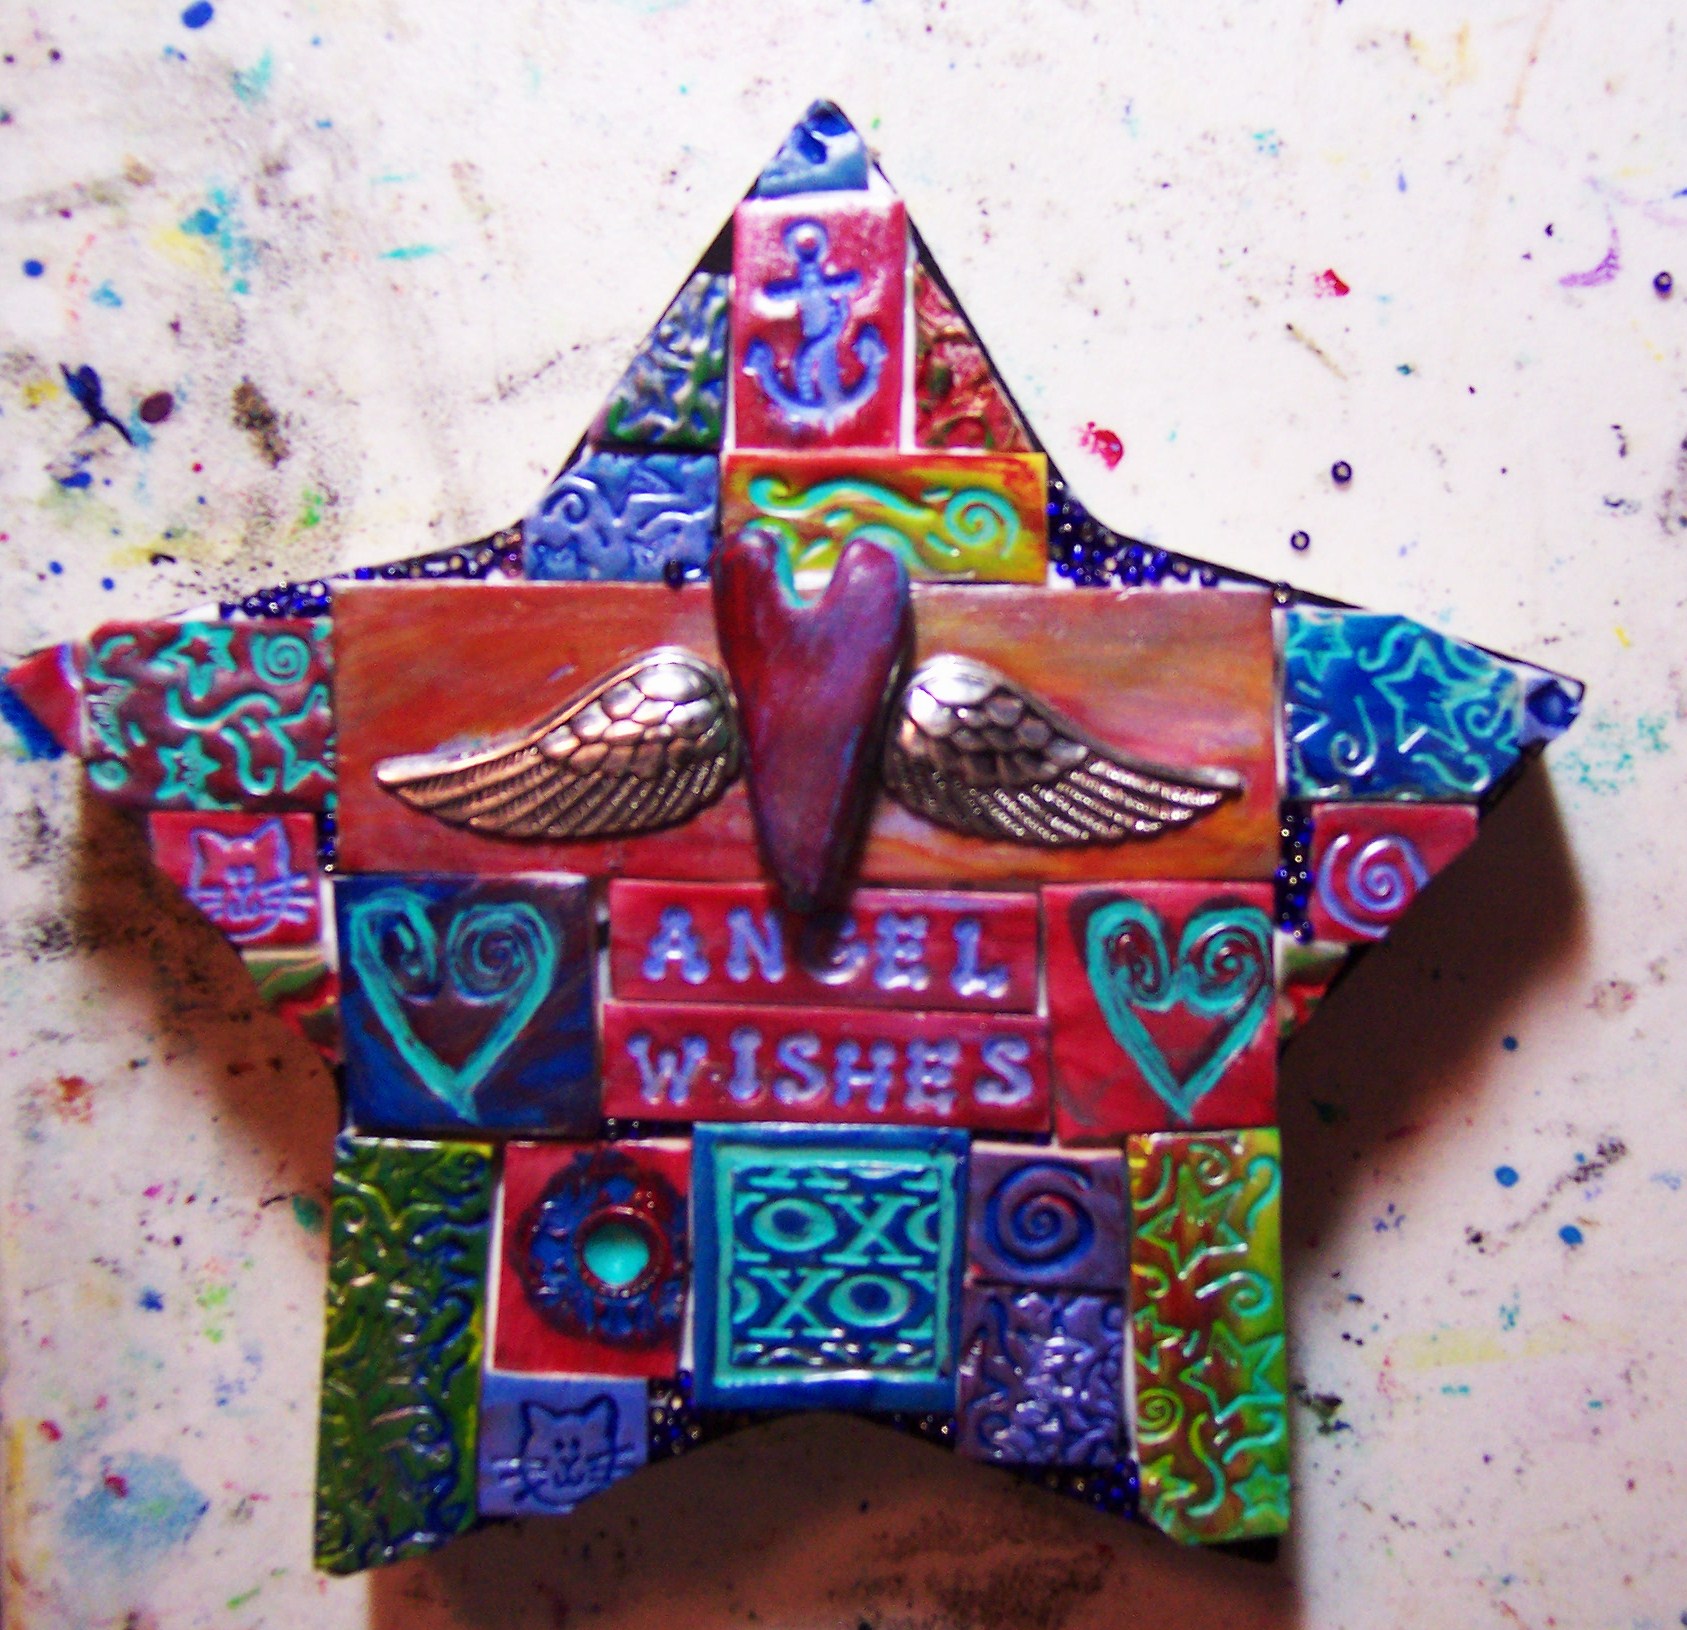
Here you can see some blue seed beads in the top two corners. The tiles were too big to cut for size.  Seed beads are great and they lend some sparkle to the project as well. Choose a color that matches the main color(s) of your design.

painting the box
Painting the box

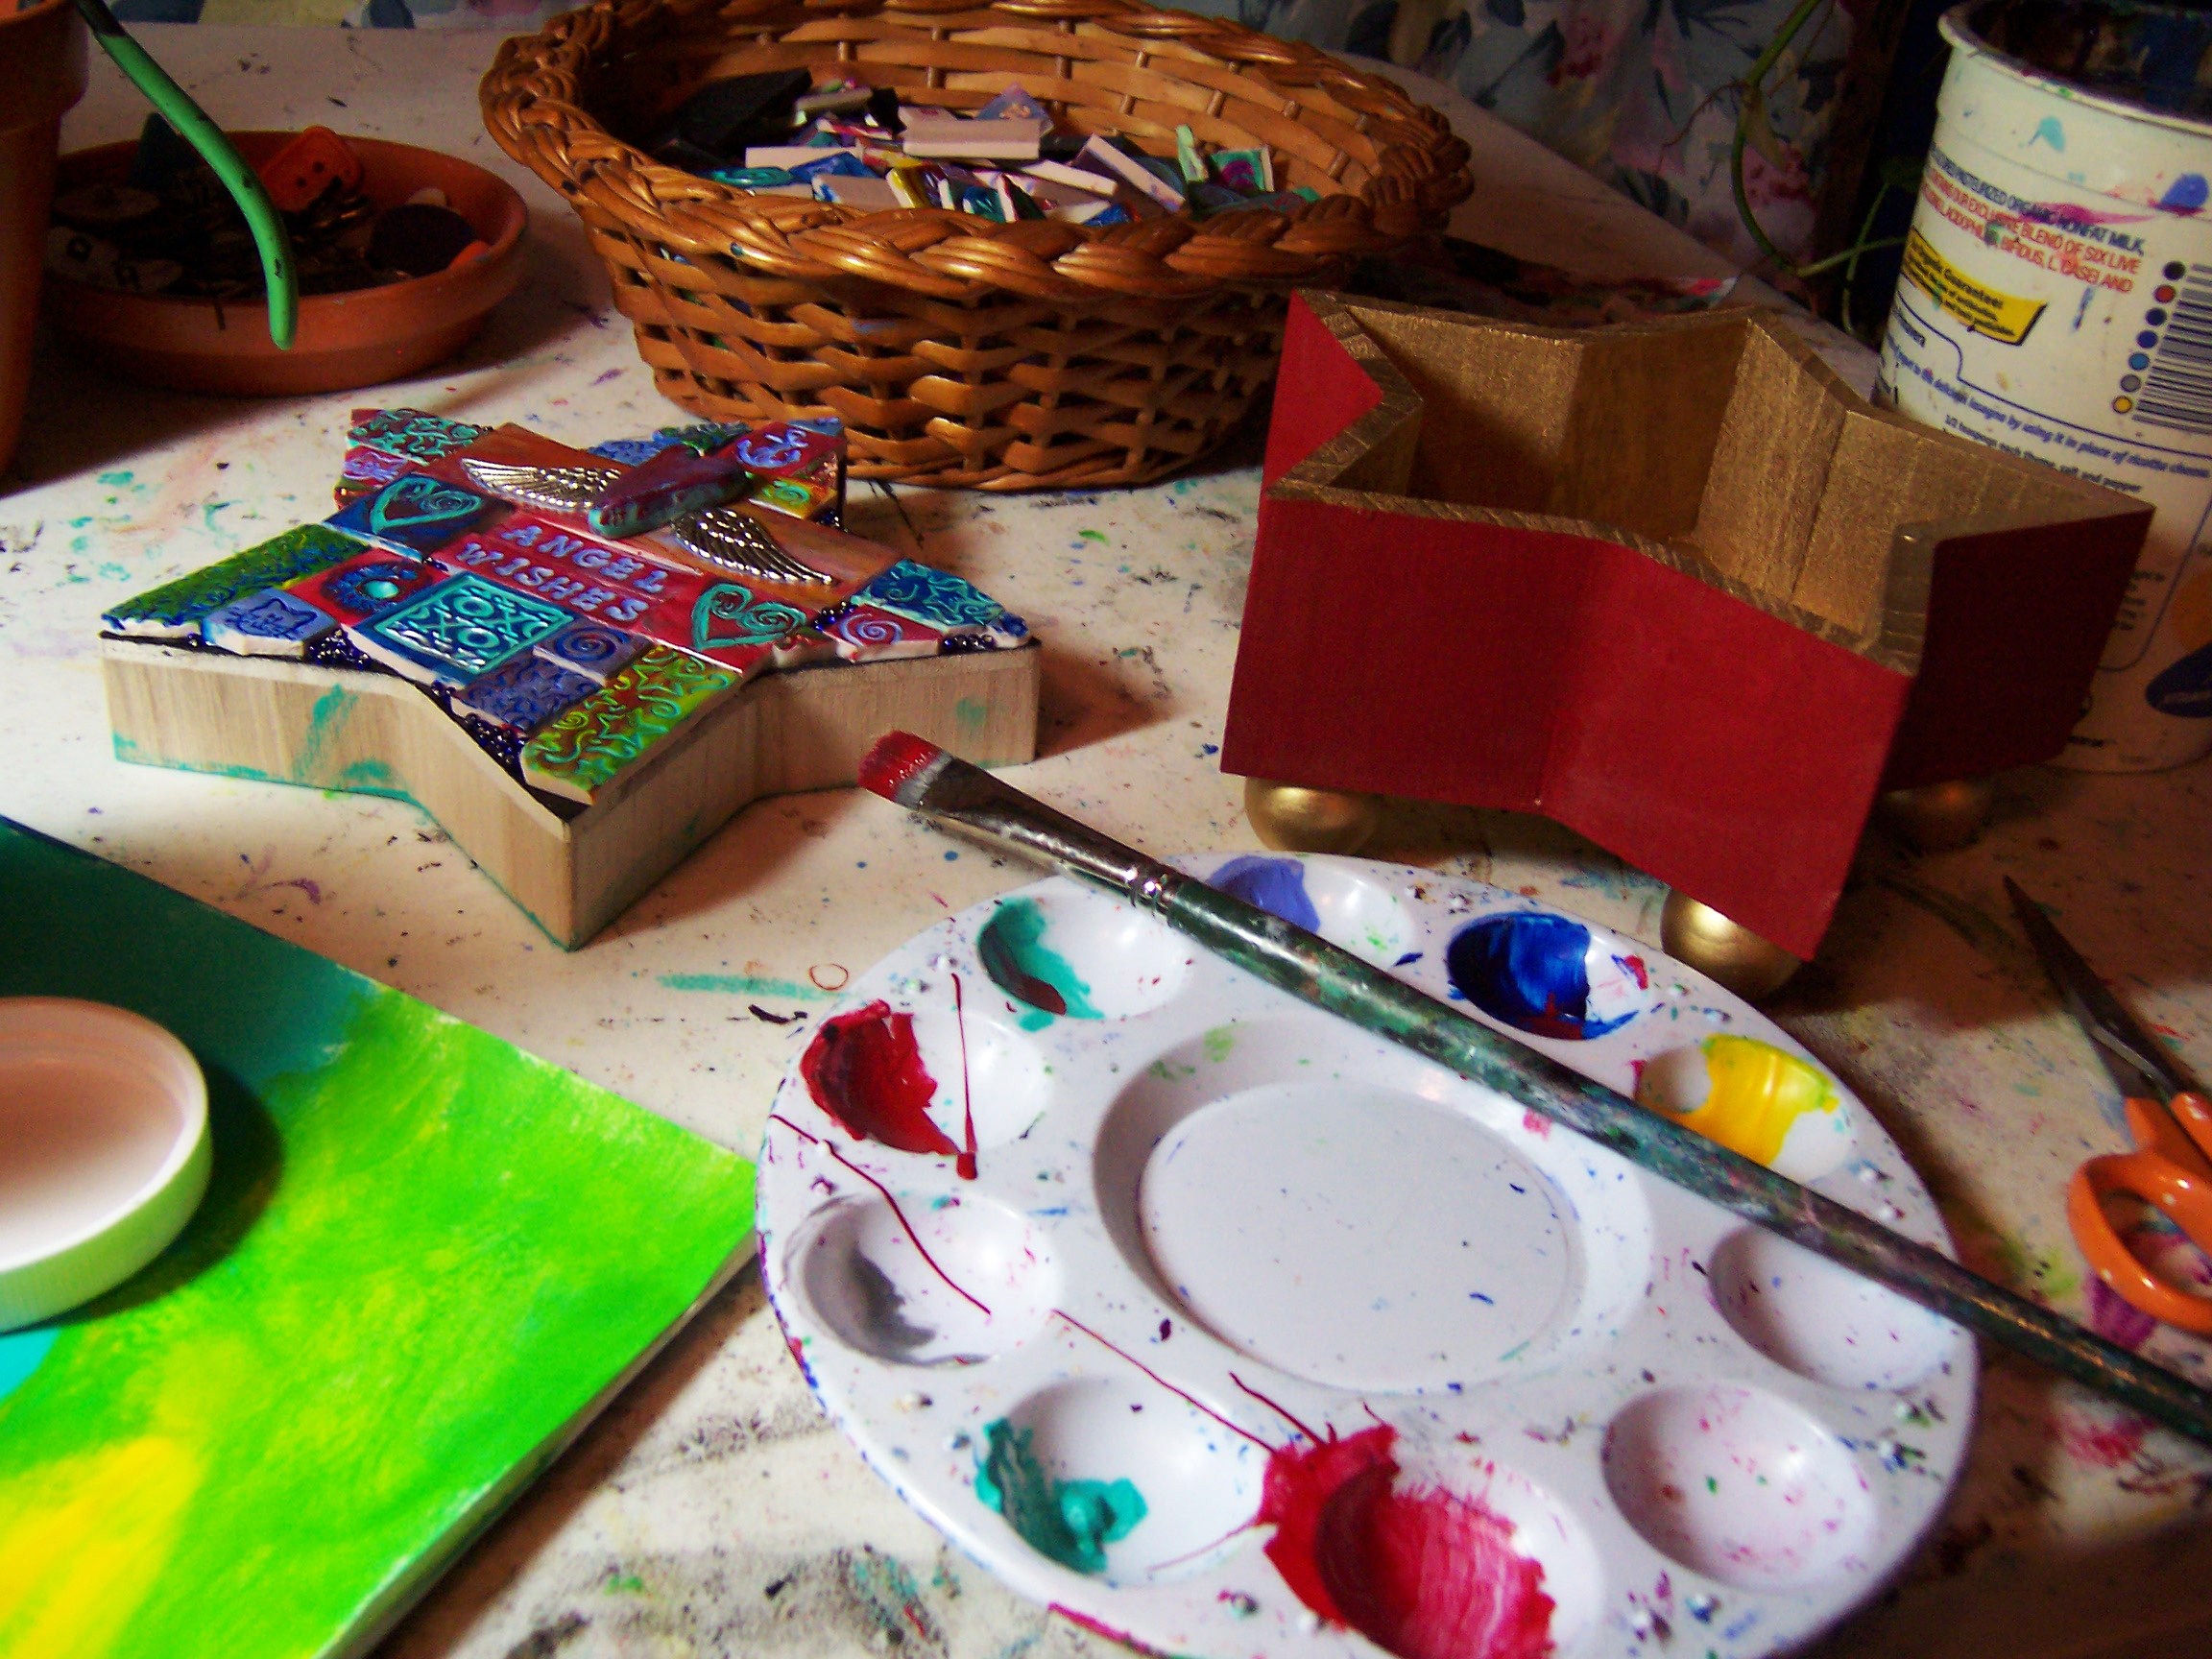
I painted the box on the outside with acrylic paints.

gold interior
spray painted interior

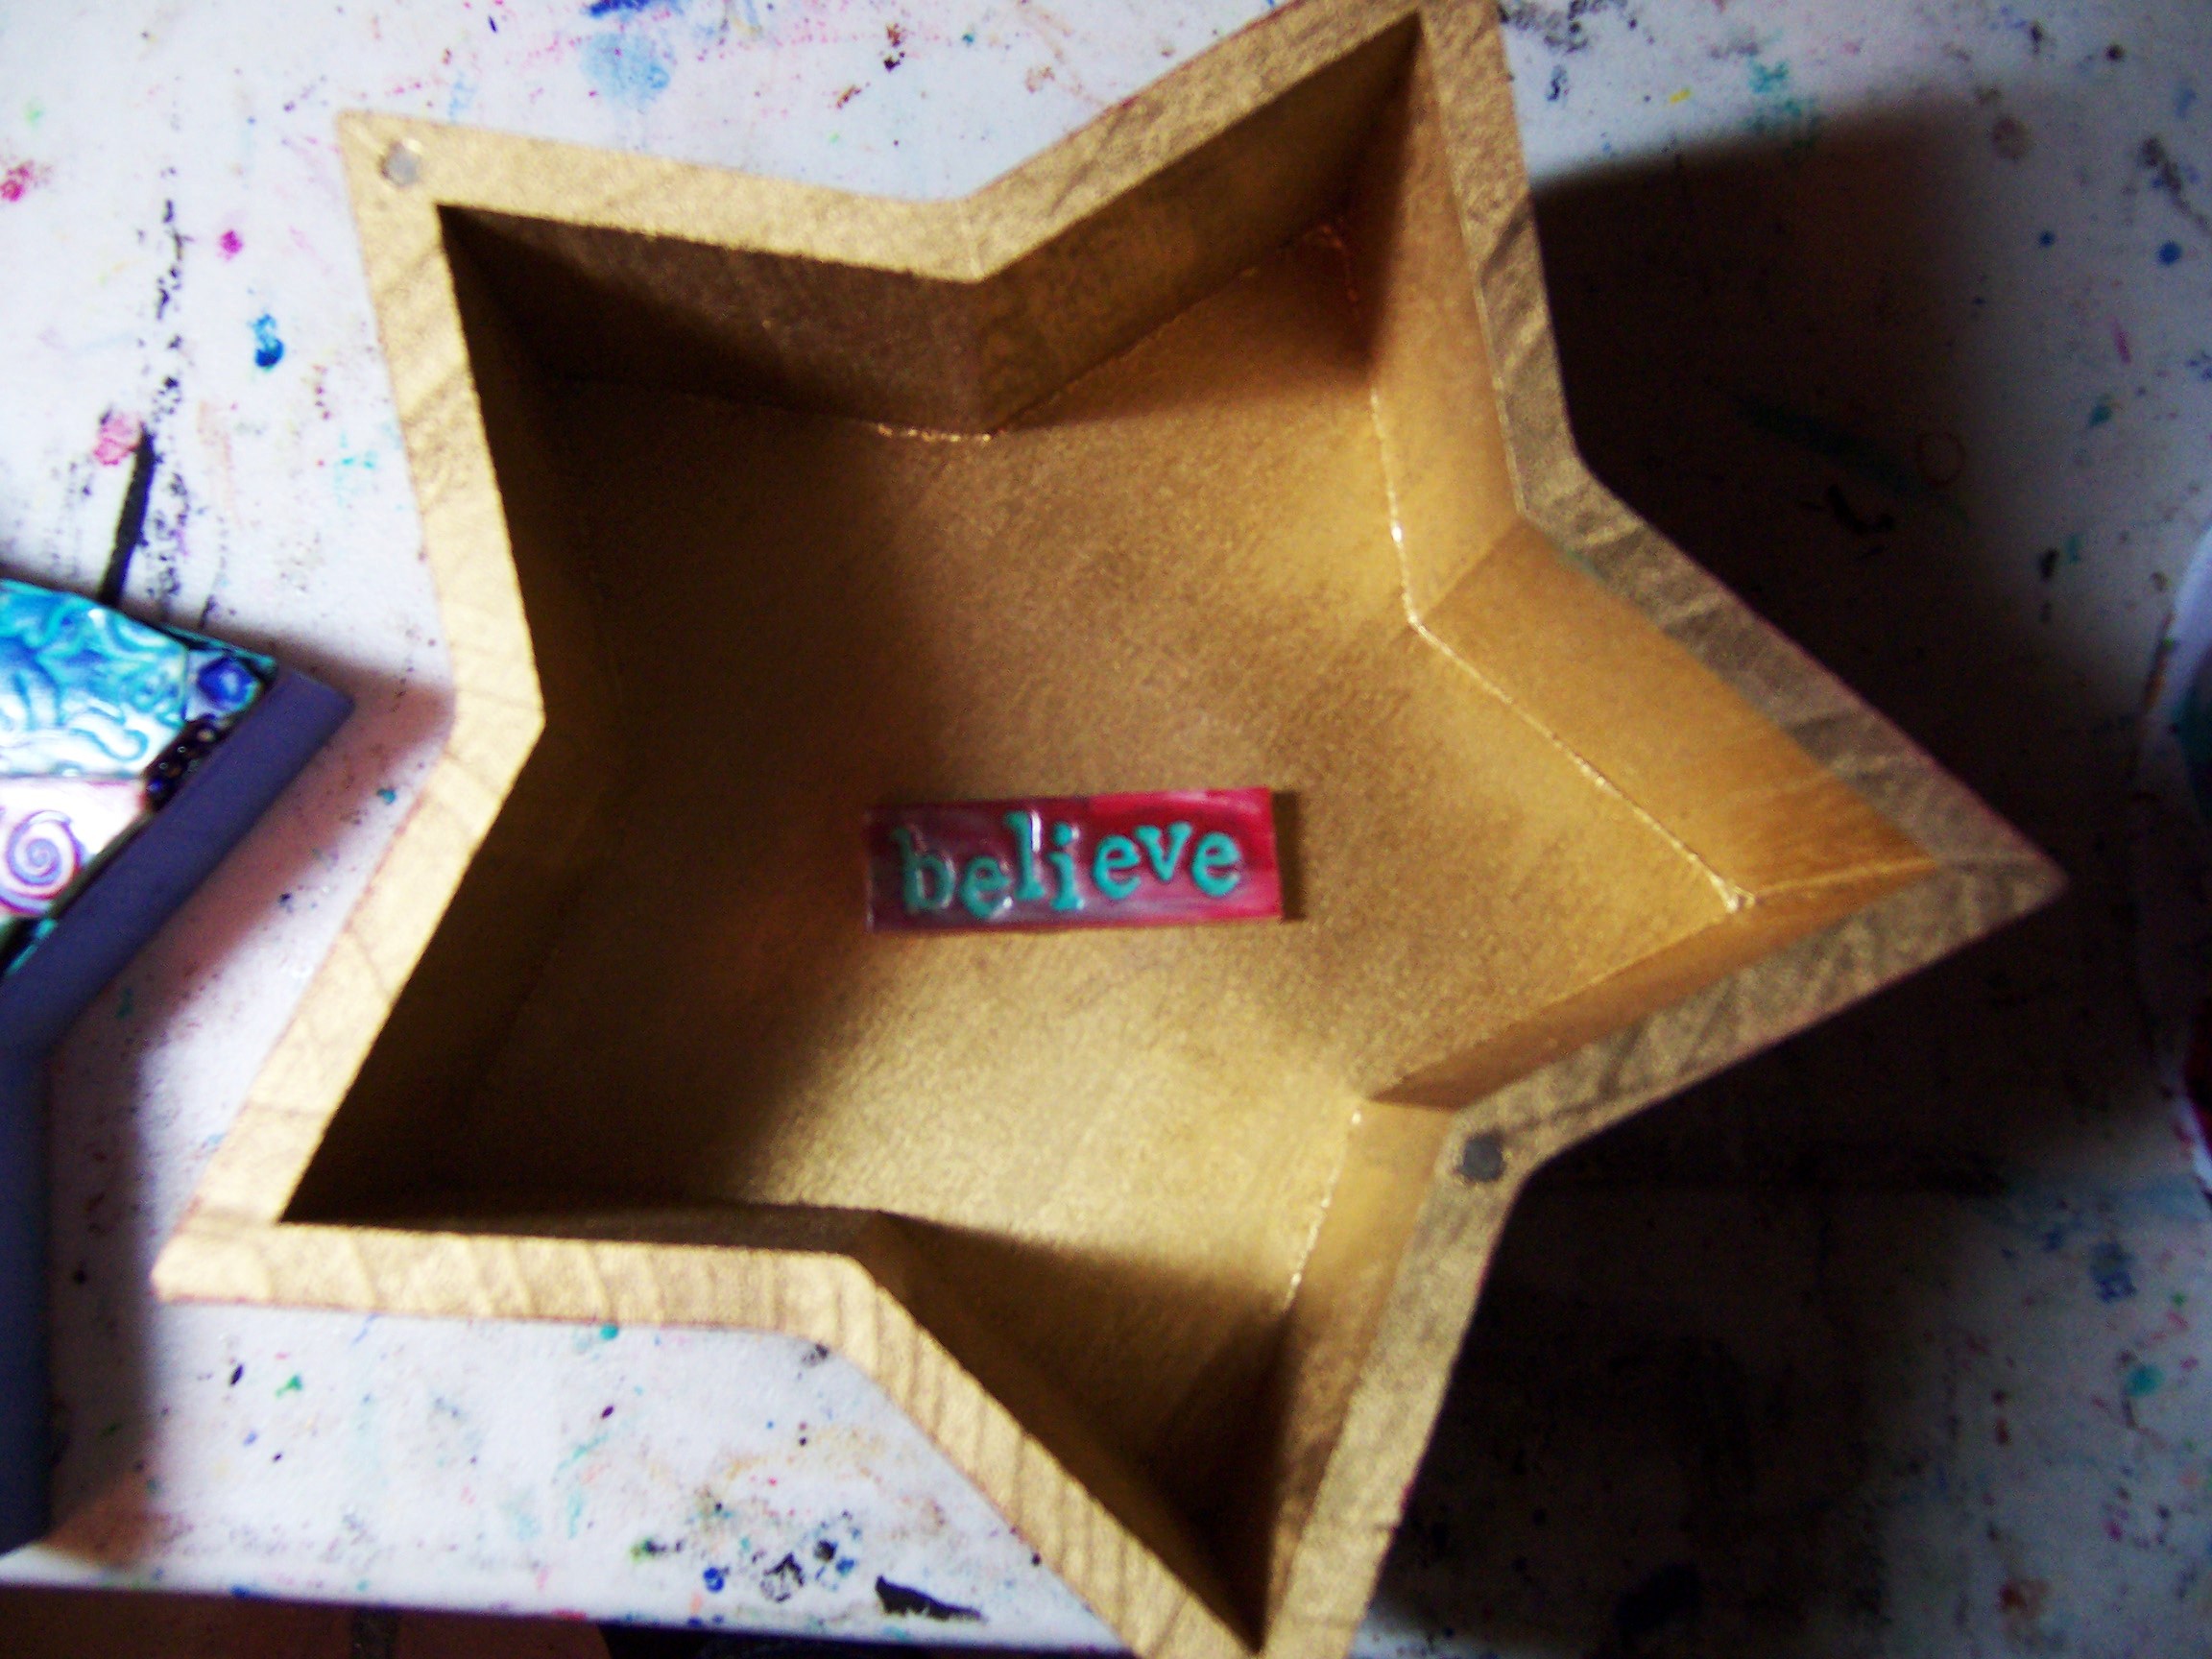
I spray paint the bottom and the interior with gold paint before I paint the rest.

finished box
finished box

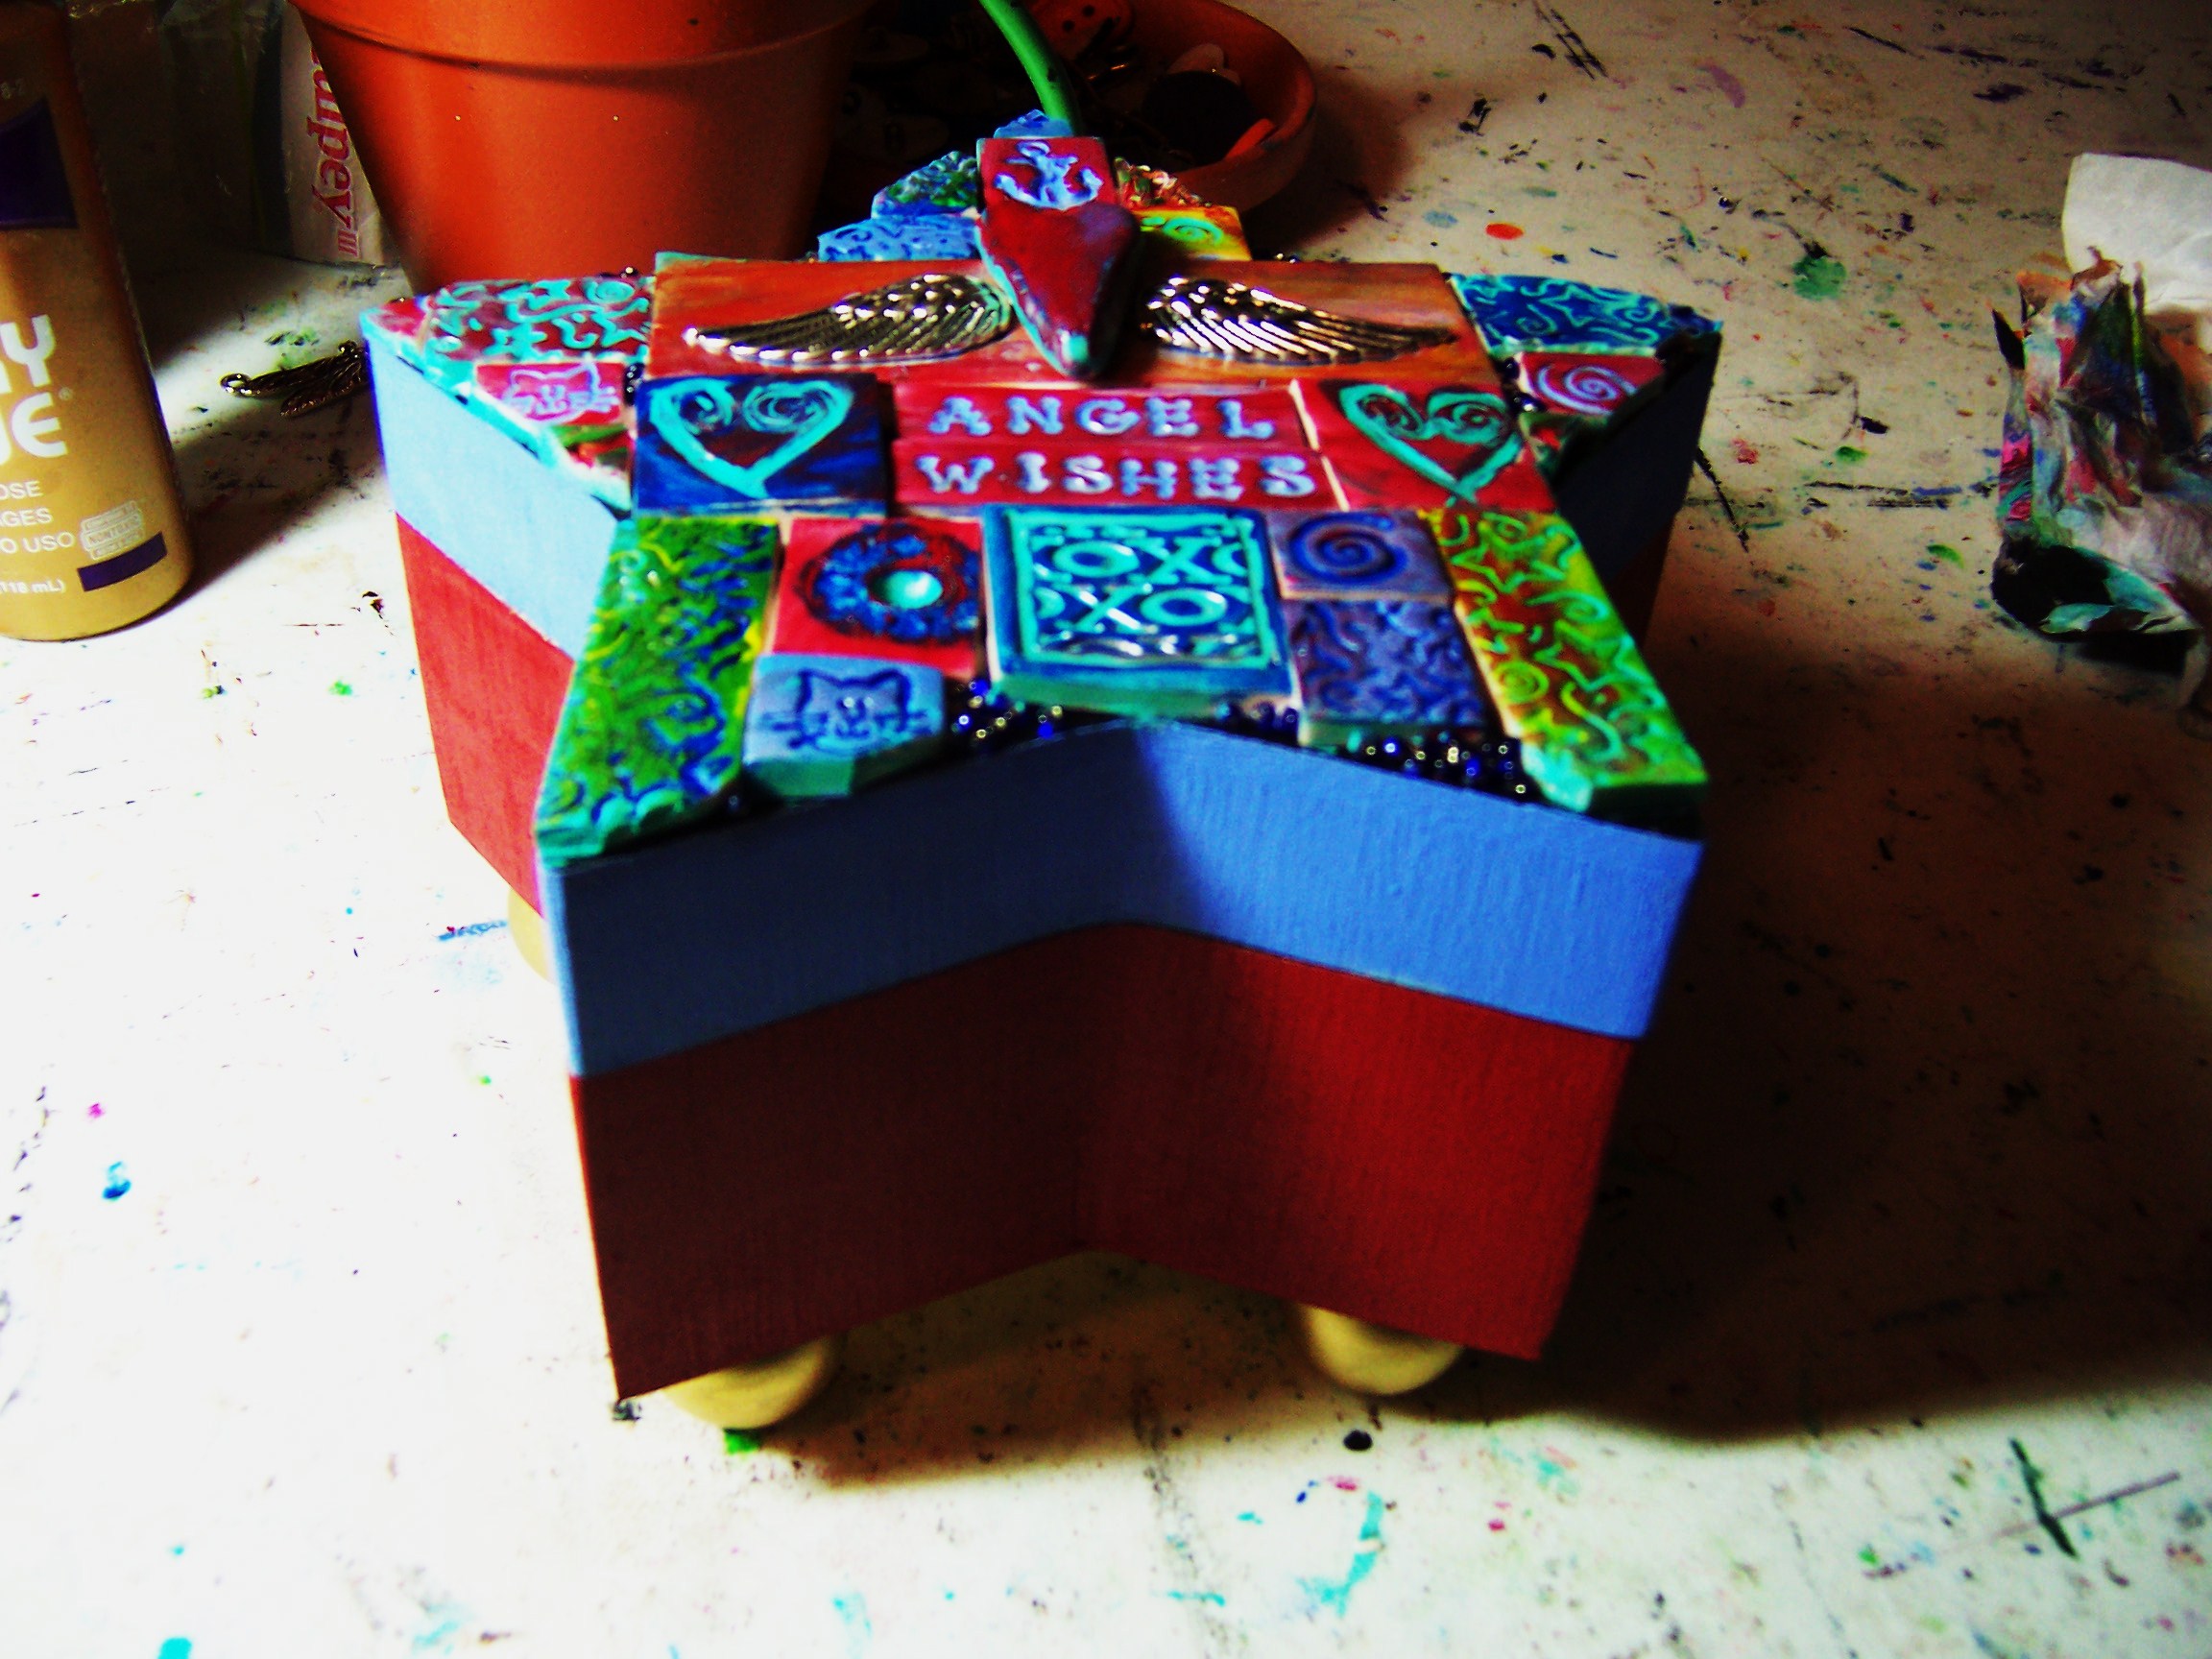
What do you think? Pretty colorful. I had fun making this, and so many others.

I made a mirror that promotes PEACE!  I thought that was a worthy thing to be reminded of while looking into a mirror.  Peace begins within and it’s a choice. I even had a Buddha charm I embedded in the clay and baked.

peace mirror
Peace mirror

The mirror part distracts from the frame in the bright outdoors, but there it is. Polymer clay is so versatile you can make almost any design.

I use old buttons, rubber stamps, charms, found objects, and lettering to imprint the tiles. You can use anything that makes a nice imprint.

If you enjoyed the tutorial, please leave a comment.

Please visit my new etsy shop, Earth and Faery.

Have a great creative week!

xo

Maria

Giveaway!

I have a giveaway on my blog today.  It’s Day 29 of the 30 day blogging challenge and I have made it through so far. I’m celebrating by giving away this FUN ink blot art journal I made from a manila folder and some ink blot art. I made it today and figured it would be fun to give away. It’s definitely a one-of-a-kind journal!

Here are some pictures and the video on how I made the journal. You can enter the giveaway or you can make your own journal. 🙂

ink blot art journal
handmade art journal
ink blot art journal
the back of the art journal
DSCN2227
ink blot page
DSCN2228
ink blot page


DSCN2229
ink blot page giveaway
ink blot page
more ink blots

An idea for you how the pages look. I added a bunch of blank card stock pages as well to fill out the journal. Here is the video how-to.

The winner was Jean Marmo. Congratulations!!! 🙂

Fabric paper anyone?

I was pondering how to make some fabric paper from the stack of dry paint wipes I had collected while making art journal pages.

I knew I had to find a way to stiffen them, make them as solid as possible. I decided to do an experiment. I used Mod Podge for one wipe and Liquitex matte medium for the other.

I made a video of this process for you.  After the video was done I realized the sky’s the limit when it comes to making versatile custom fabric / paper.

Surely one-of-a-kind!  I even stiffened a paper towel rag to see how it would turn out. Check out the video and see for yourself. I hope it gives you some good ideas. 🙂

xo

Maria

Painting polymer clay mosaic tiles.

I made a YouTube video today on how to paint polymer clay mosaic tiles.  A few days ago I posted a picture tutorial on how to put the tiles onto a frame so that is another post you can check out for more information on the polymer clay mosaics.

DSCN2161
polymer clay mosaic tiles on a wood frame.

They are a lot of fun to make and they look rich and colorful with three layers of paint. The last layer is embossing powder.

Where there are gaps between tiles I use seed beads or black polymer clay “rods” covered with gold leaf as fillers. That makes the art work extra shiny and rich. You can’t add too much bling to this type of art work.

You can use any color combination, but I’m partial to blues, teals, purple, and reds.  As you experiment you’ll come up with your favorites.

Here is the video.

Fabric painting with a twist.

You know all about fabric paints and how to use them, and the dyes in powders, but have you tried fabric painting with acrylic paints and inks that you normally use for art?

I have been painting scraps of fabrics that I use for my bracelet cuffs (video at the end.) I use craft paints, acrylic artist paints, Dylusion inks, and Adirondack inks. All the material is water fast but you have to wash everything by hand in cold water and dry the fabric flat.

I always use cotton fabric since it’s the most absorbent.

Here are some pictures.

DSCN2163
scraps of cotton fabric and paints + inks.

Some examples of craft paints and inks.

DSCN2165
craft paint dripping

I dripped some of the craft paints straight from the bottle onto the fabric.

DSCN2166
after spreading the paint

I scrunched up the fabric into a tiny ball. If you don’t like paint on your hands, wear plastic gloves.  As you can see, the paint spread all over.

DSCN2168
added ink

I added some Adirondack inks. I used the colors copper and currant.  I held the bottles about 20 inches above the fabric and gently dripped the ink to get some splashes, not just globs of ink.  As you can see I mix and match the materials.

DSCN2169
Dylusion ink sprays

I used Dylusion ink sprays on this fabric. As you can see it diffuses gently. Be careful not to spray the ink where you don’t want it (including your hands.) It’s very hard to get off, and you can never remove it from the painted surface.  The spray comes in yummy colors though.

DSCN2171
Adirondack inks

I used a couple of colors of Adirondack inks on top of the Dylusion spray.  Pretty dramatic effect in my opinion.

DSCN2172
Craft paints

Here I squeezed some craft paint straight from the bottle on top of some light green corduroy fabric.

DSCN2173
paint spread on fabric

I rolled up the fabric into a tight log and this is how it came out when I unrolled it.

DSCN2174
the other side of the fabric

The paint bled through and saturated the other side of the fabric so I can now choose which side I like the best when I use it.

DSCN2175
writing

You can write on the dry fabric with permanent markers to make it even more interesting. 🙂

DSCN2178
Better quality artist paints diluted into spray bottles.

You can make very diluted acrylic artist paints in spray bottles and use that too.

DSCN2179
acrylic paints

From the spray bottles on some muslin.

DSCN2180I finished that with some drips of Adirondack inks.

The fabrics dry pretty stiff. You can iron them flat between newspaper or other protective paper.

You can add other fabric and fusible web to make them even more solid.

It is a FUN way to create your own fabric.  I love to make things out of it, like fabric bracelet cuffs.

Check out this YouTube video if you want to see how I made a cuff.

Art journal made from a manila folder.

I have a fun tutorial to share today on how to make an art journal with a manila folder cover.

The pictures are not the greatest, but I had only artificial light when I took them.  I wanted to show the step by step process.

Now for the tutorial…


old manila folder
I started with a used manila folder and blacked out the text on the tab.  I used a liberal amount of Mod-Podge to glue the folder together, being careful that the edges stuck well.  I still ended up with some air bubbles once it dried.  Grrr.
I used a strip of washi tape over the uneven edges and glued down some white cardboard to reinforce the tab.  I made sure to lay down a strip of glue to hold down the washi tape forever, lol.
I folded the manila folder in half, using a bone folder to really press down the crease hard once the Mod-Podge had dried.  This was before the washi tape obviously…
I cut the white cardboard to the shape of the tab and now had a very sturdy tab.
I now laid the folder flat on my table and spread out a layer of paint…
I spread some paint on the back of the folder.  I like the shabby uneven look.
I used several layers of paint, mostly spread with an old gift card.  Both sides are similar, just a slight difference in the colors.
I painted the tab purple and wrote the words “Good Dreams” on it.  I stamped the front cover with the word Imagine, and there is plenty of space for embellishment.  The back cover has only paint on it, so there is plenty of room for creativity.
I cut out some paper stars to cover the air bubbles on the inside cover and stamped some inspirational words.


I used card stock paper for the signature.  There are 24 empty pages to embellish when all is said and done. They are a bit narrow, but that’s the shape of the folder. Card stock is not as durable as watercolor paper, but you can certainly use wet medium and paints on it. I used card stock in various colors.


I tried to get a picture of the various papers, but it didn’t turn out great.  There are two sheets of green, two yellow, and two manila colored.  I thought it was fun to add varied colors.


The inside front cover adjoins a green paper…


And another close up of the back inside cover.  The picture is pinkish, and I blame my camera for that.
What do you think? I really enjoyed the project and I can’t wait to embellish the pages.  It’s a good size for traveling too.
What are you working on now?
xo
Maria
P.S. I have some journals for sale in my etsy shop. CLICK HERE.